Upgrading Sprocket
Sprocket can be upgraded from the About section in Sprocket Settings. If a newer version is available, an administrator can start the upgrade directly from SharePoint without downloading and replacing the package manually.
Upgrading between major versions? If you are upgrading from v4.x, v5.x, or v6.x to a newer major version, review Upgrading Sprocket from Older Versions first. Older major versions may use different package names.
These steps apply to standard tenant or site collection App Catalog deployments. If Sprocket was installed using the individual site collection installation guide, or if you cannot see an existing Sprocket deployment in your App Catalog, contact support before upgrading.
Before You Start
To upgrade from the About section, you need permission to update the relevant SharePoint App Catalog.
If you do not have access, Sprocket shows Admin access required in the Version Management area. Ask a SharePoint administrator to perform the upgrade or use the manual upgrade instructions linked from the About section.
Check Your Current Version
-
Go to a SharePoint site where Sprocket is installed.
-
Click the Sprocket icon in the lower-left corner.
-
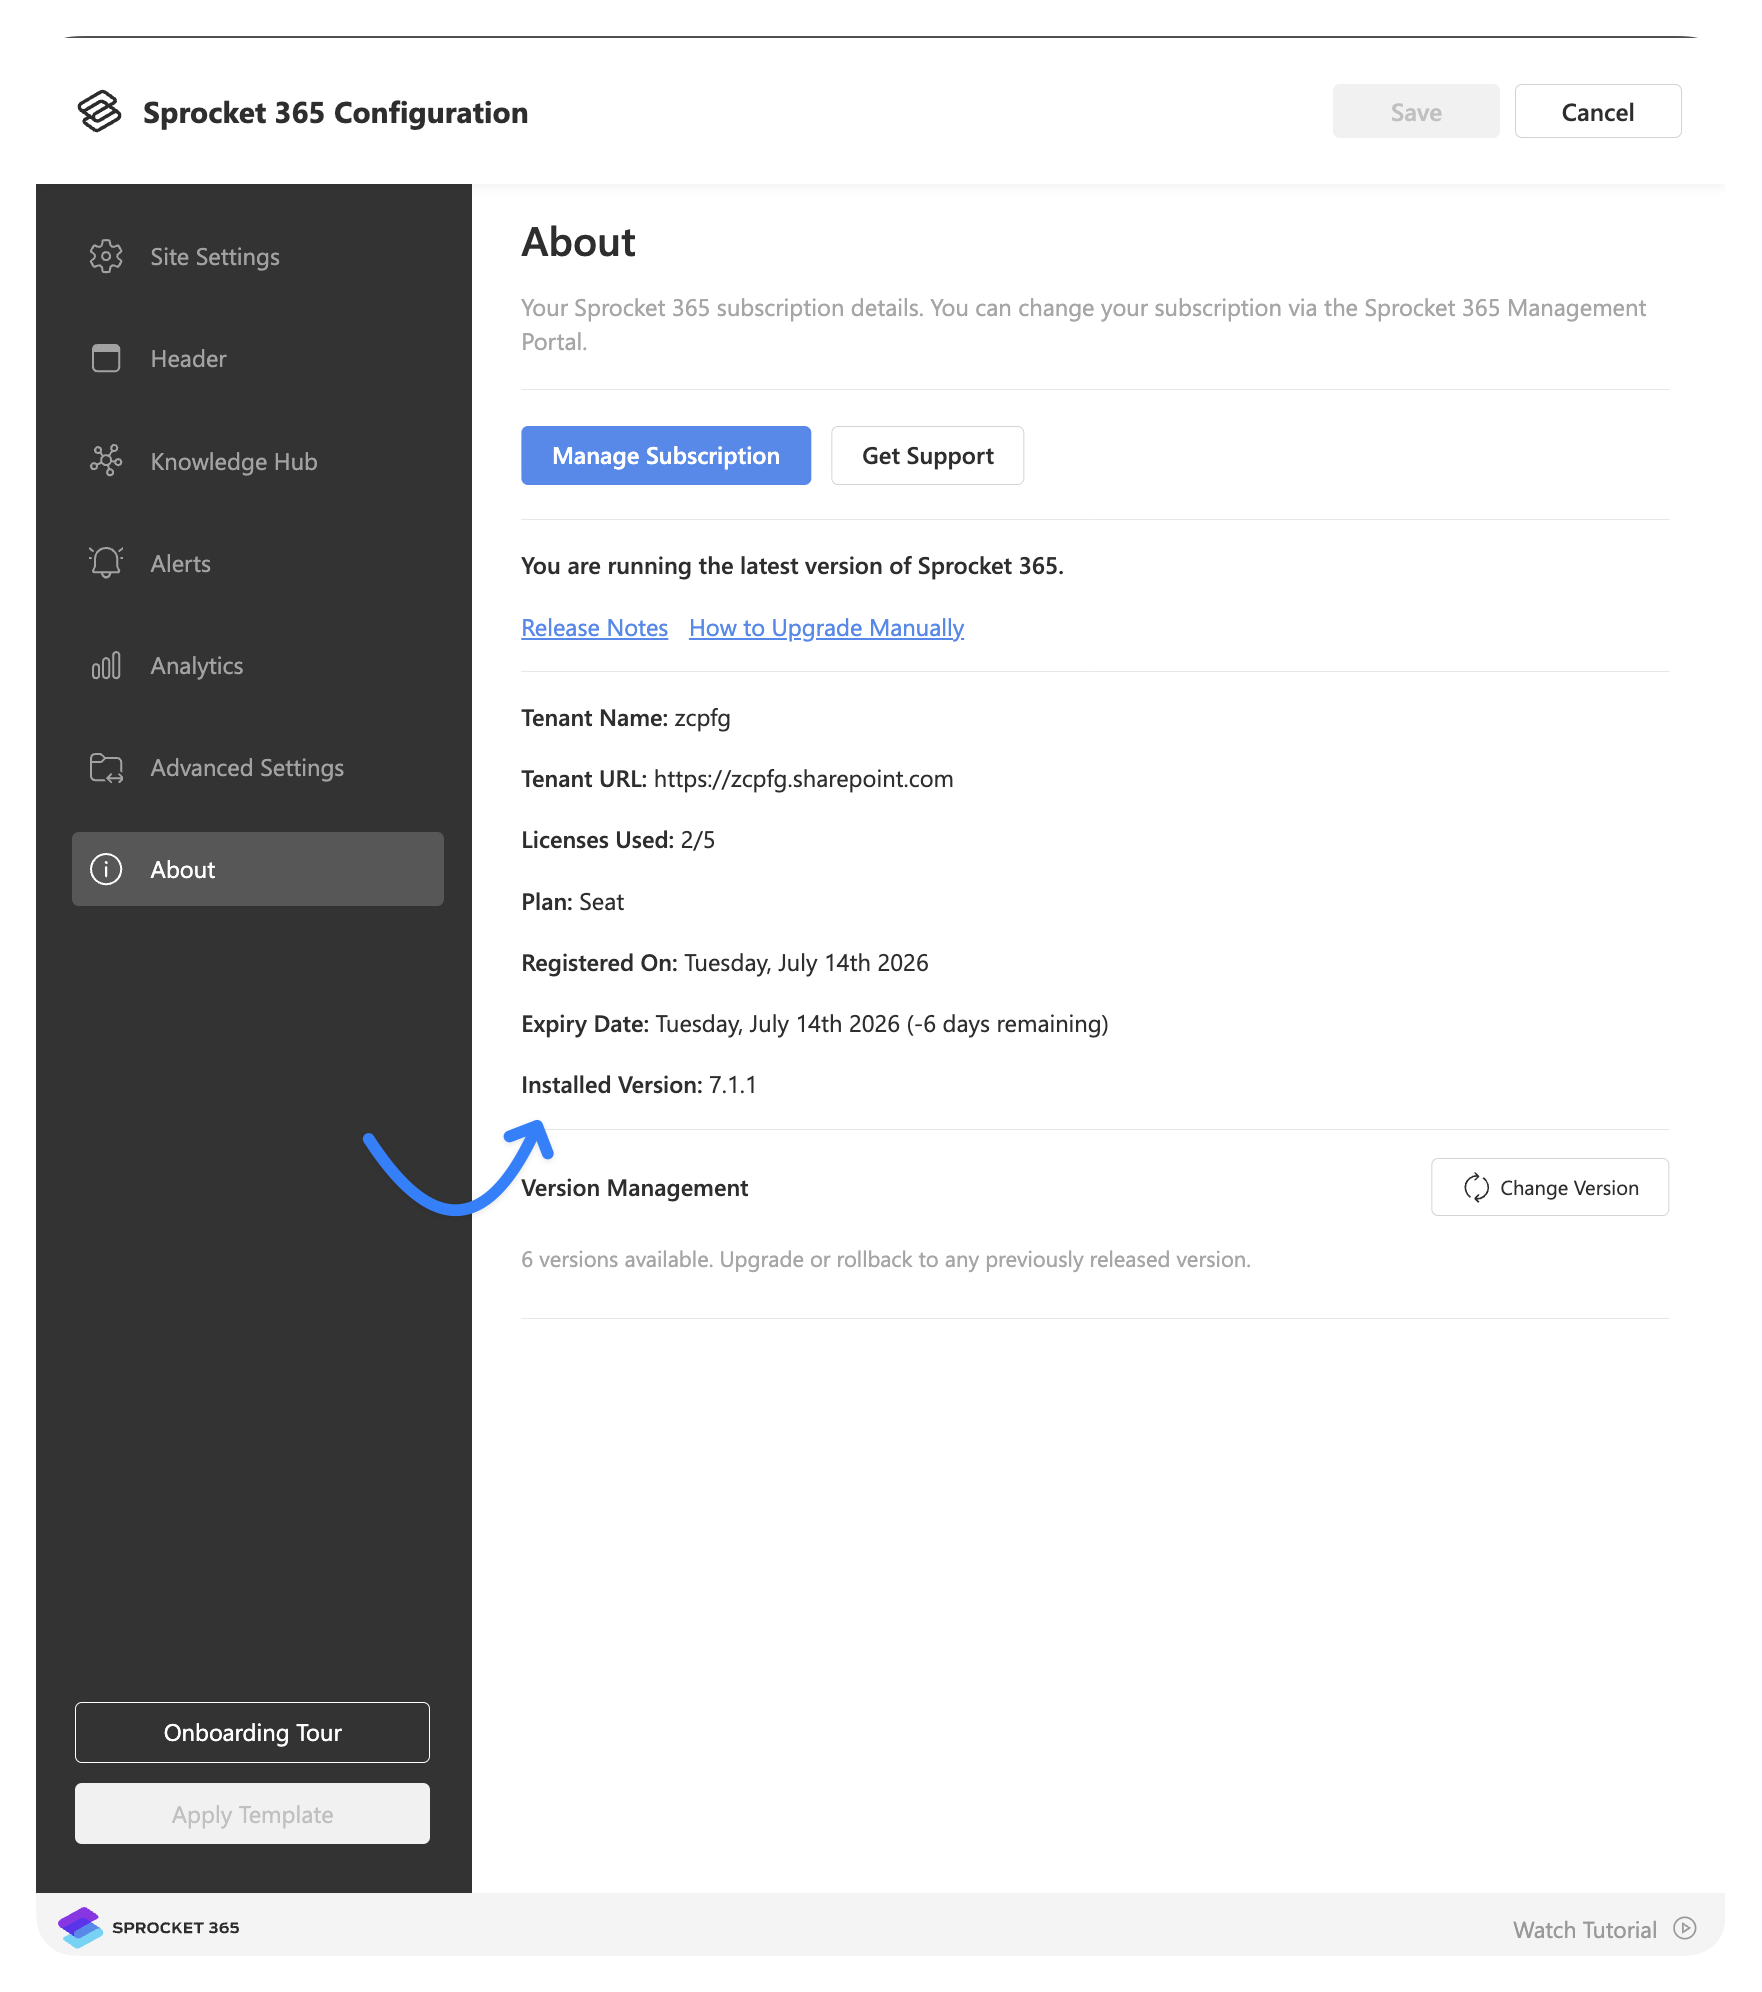
Open the About tab.
-
Review the Installed Version.
If your site is already on the latest version, the About tab shows You are running the latest version of Sprocket 365.
Upgrade to the Latest Version
When a newer version is available, the About tab shows New Version Available and an Upgrade Now button.
- Open Sprocket Settings.
- Go to the About tab.
- Select Upgrade Now.
- If prompted, choose the App Catalog to update.
- If you are upgrading the tenant App Catalog, confirm whether Make this solution available to all sites in the organization should be selected.
- Review the confirmation message.
- Select Confirm.
Sprocket will download the package, upload it to the App Catalog, deploy it, and complete the upgrade.
Do not close the panel or navigate away while the upgrade is running.
When the upgrade completes, select Refresh Page to load the new version.
Change Version or Roll Back
Use Change Version when you want to choose a specific version instead of upgrading directly to the latest version.
- Open Sprocket Settings.
- Go to the About tab.
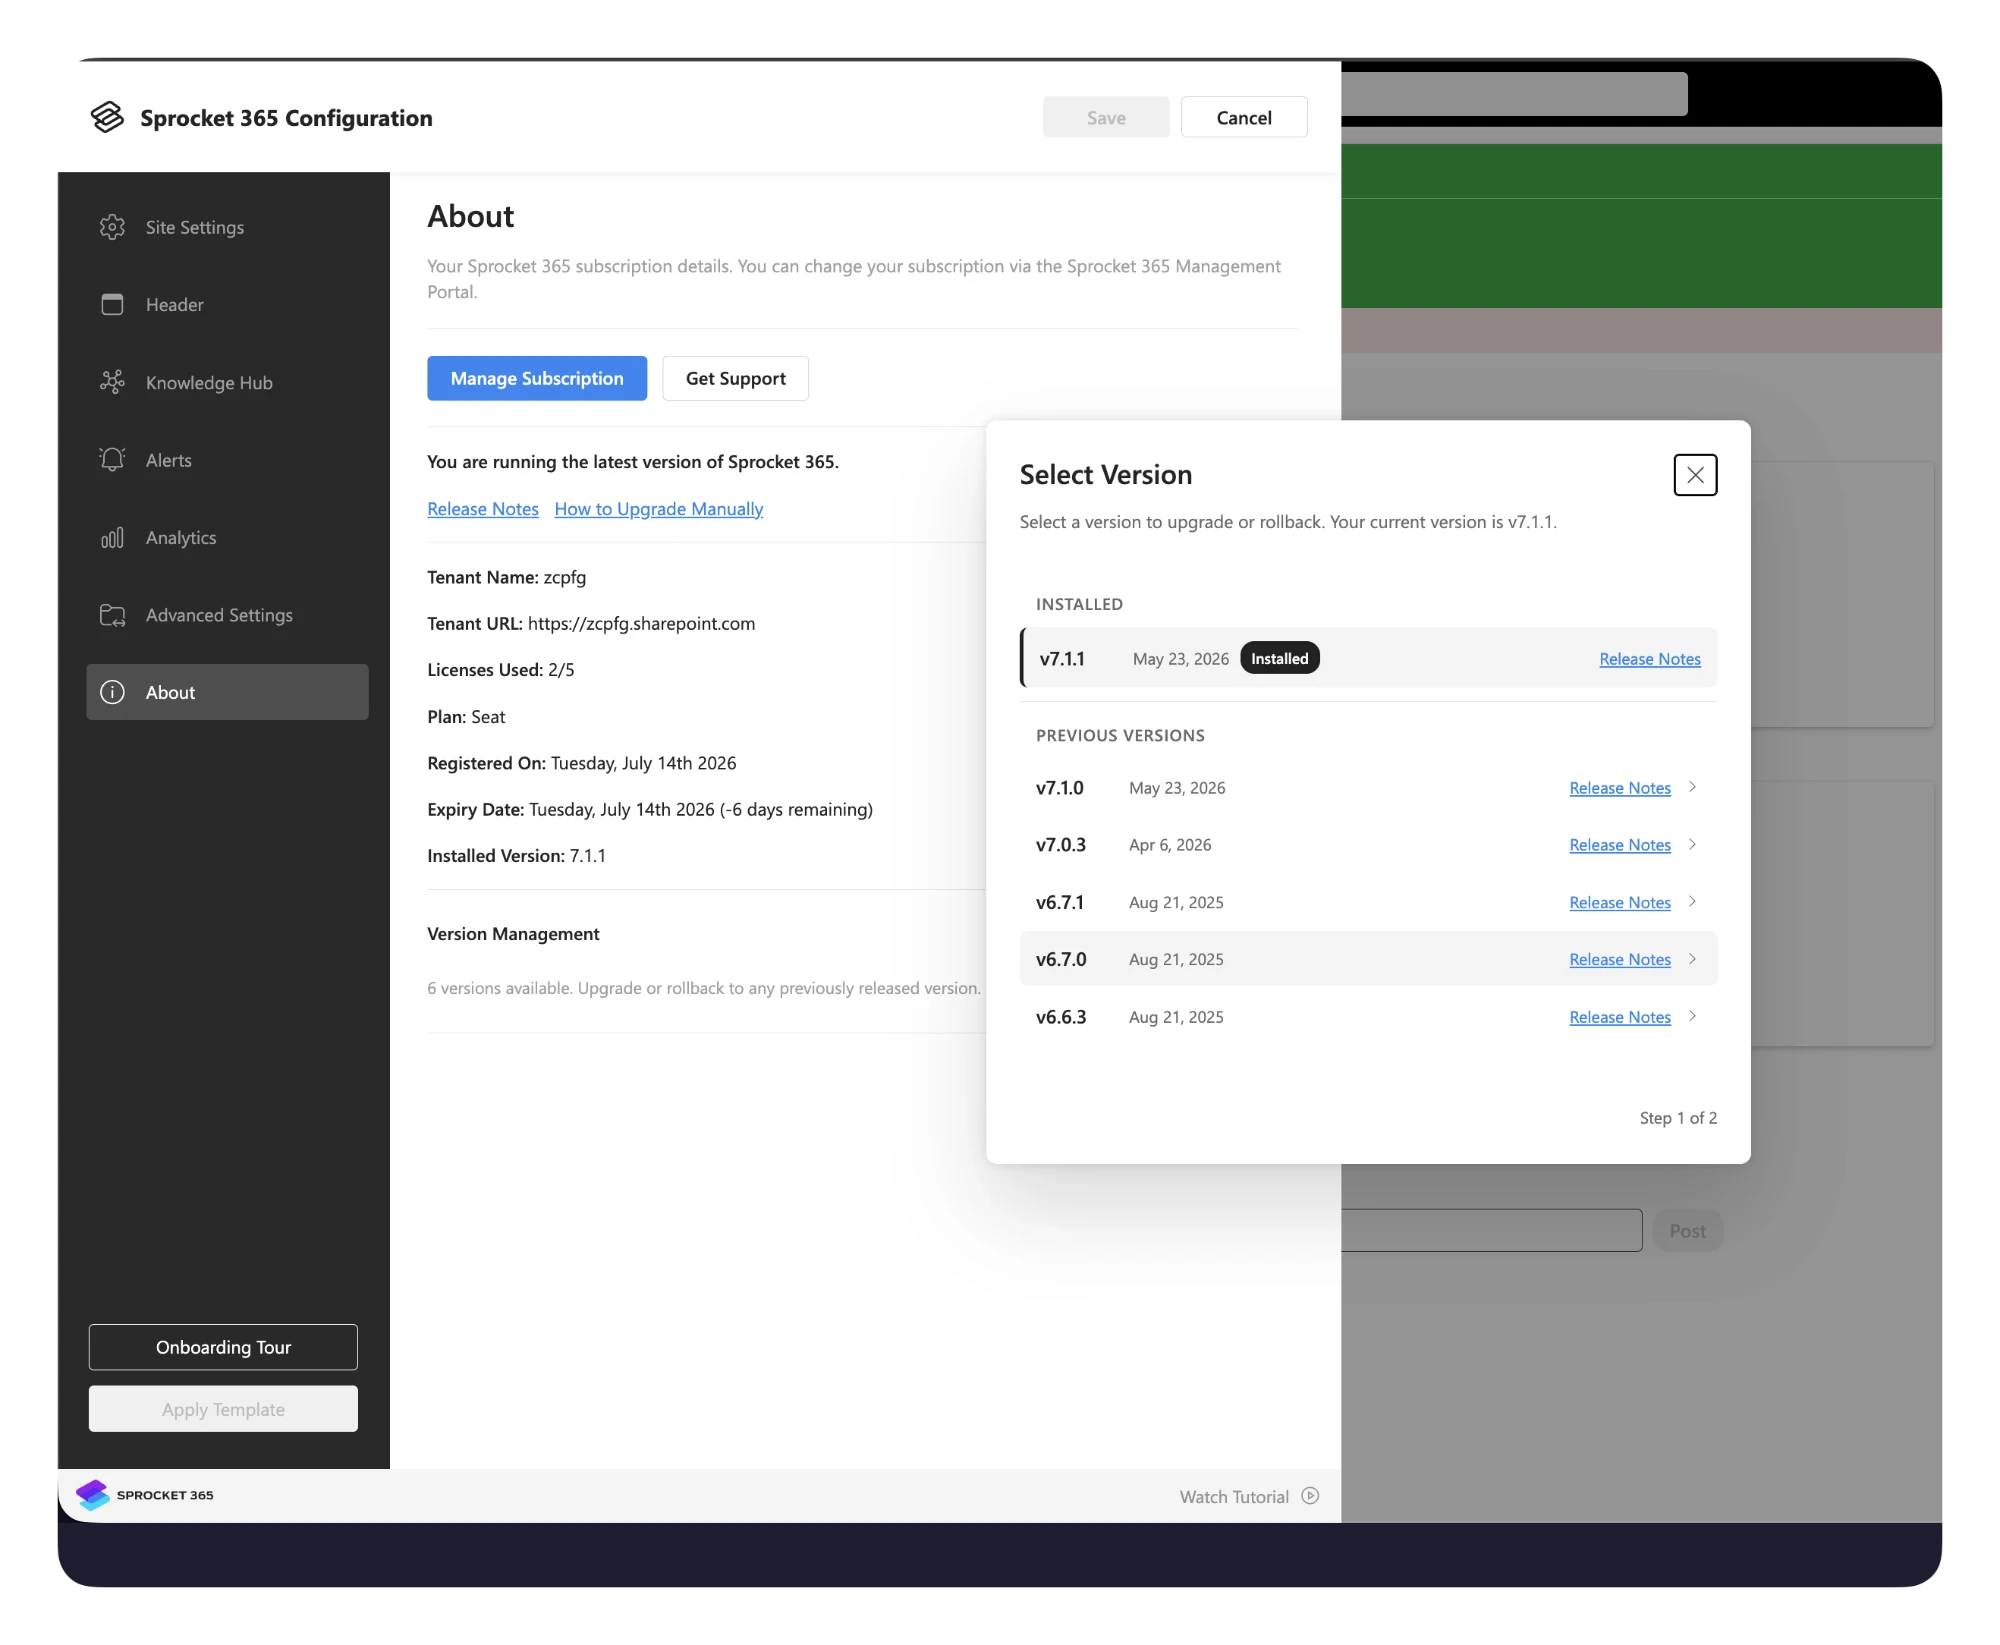
- In Version Management, select Change Version.
- Choose the App Catalog if more than one is available.
- Select the version you want to install.
- Review the current and target versions.
- Select Upgrade to vX.X.X or Downgrade to vX.X.X.
- Wait for the process to complete.
- Refresh the page when prompted.
Downgrading may affect features that were added in newer versions. Only roll back if you have a clear reason to do so.
If the Upgrade Fails
If Sprocket cannot complete the upgrade, the result screen shows the failed stage and offers Retry.
If retrying does not resolve the issue:
- Confirm you have permission to update the selected App Catalog.
- Try the upgrade again later in case the App Catalog or network request was temporarily unavailable.
- Use the manual upgrade link from the About tab.
- Contact support if the issue continues.
Manual Upgrade Option
The About tab includes a How to Upgrade Manually link. Use this path when:
- You do not have access to the in-product upgrade controls.
- Your organisation requires App Catalog changes to be performed directly in the SharePoint admin centre.
- A support team member asks you to complete a manual package replacement.
After any upgrade, SharePoint caching may take several minutes to reflect the new version across all sites.