Knowledge Hub
Why Knowledge Hub?
Transform your SharePoint site into a comprehensive knowledge management system that combines intuitive wiki-style navigation with powerful compliance tracking and document conversion capabilities. Knowledge Hub makes information sharing effortless while ensuring the right people access the right information at the right time.
Key Features & Capabilities
Navigation & Organization
- Wiki-Style Left Navigation: Hierarchical tree structure with drag-and-drop feature.
- Search: Quickly find any content by searching through page titles and content.
- Placeholder Headers: Create folder-like groupings to organize related content sections.
Compliance & Tracking
- Read Lists: Trackable compliance and auditing system with assignment capabilities.
- Reading Progress: Mark pages as read and track completion status.
- Due Date Management: Set due dates for required reading assignments.
Document Conversion & Processing
- Word to Page Conversion: Transform Word documents into SharePoint pages instantly.
- PDF Export: Download individual pages as formatted PDFs.
- No Size Restrictions: Handle documents of any size or complexity.
- Format Preservation: Maintain original formatting, images, and structure.
- Bulk Processing: Convert multiple documents directly from document libraries.
Quick Start
1. Enabling Knowledge Hub
Team Site Support: SharePoint Team sites support both left navigation and top navigation. In order to enable Sprocket Knowledge Hub within a Team site you must ensure your Team site is using top navigation. More Info
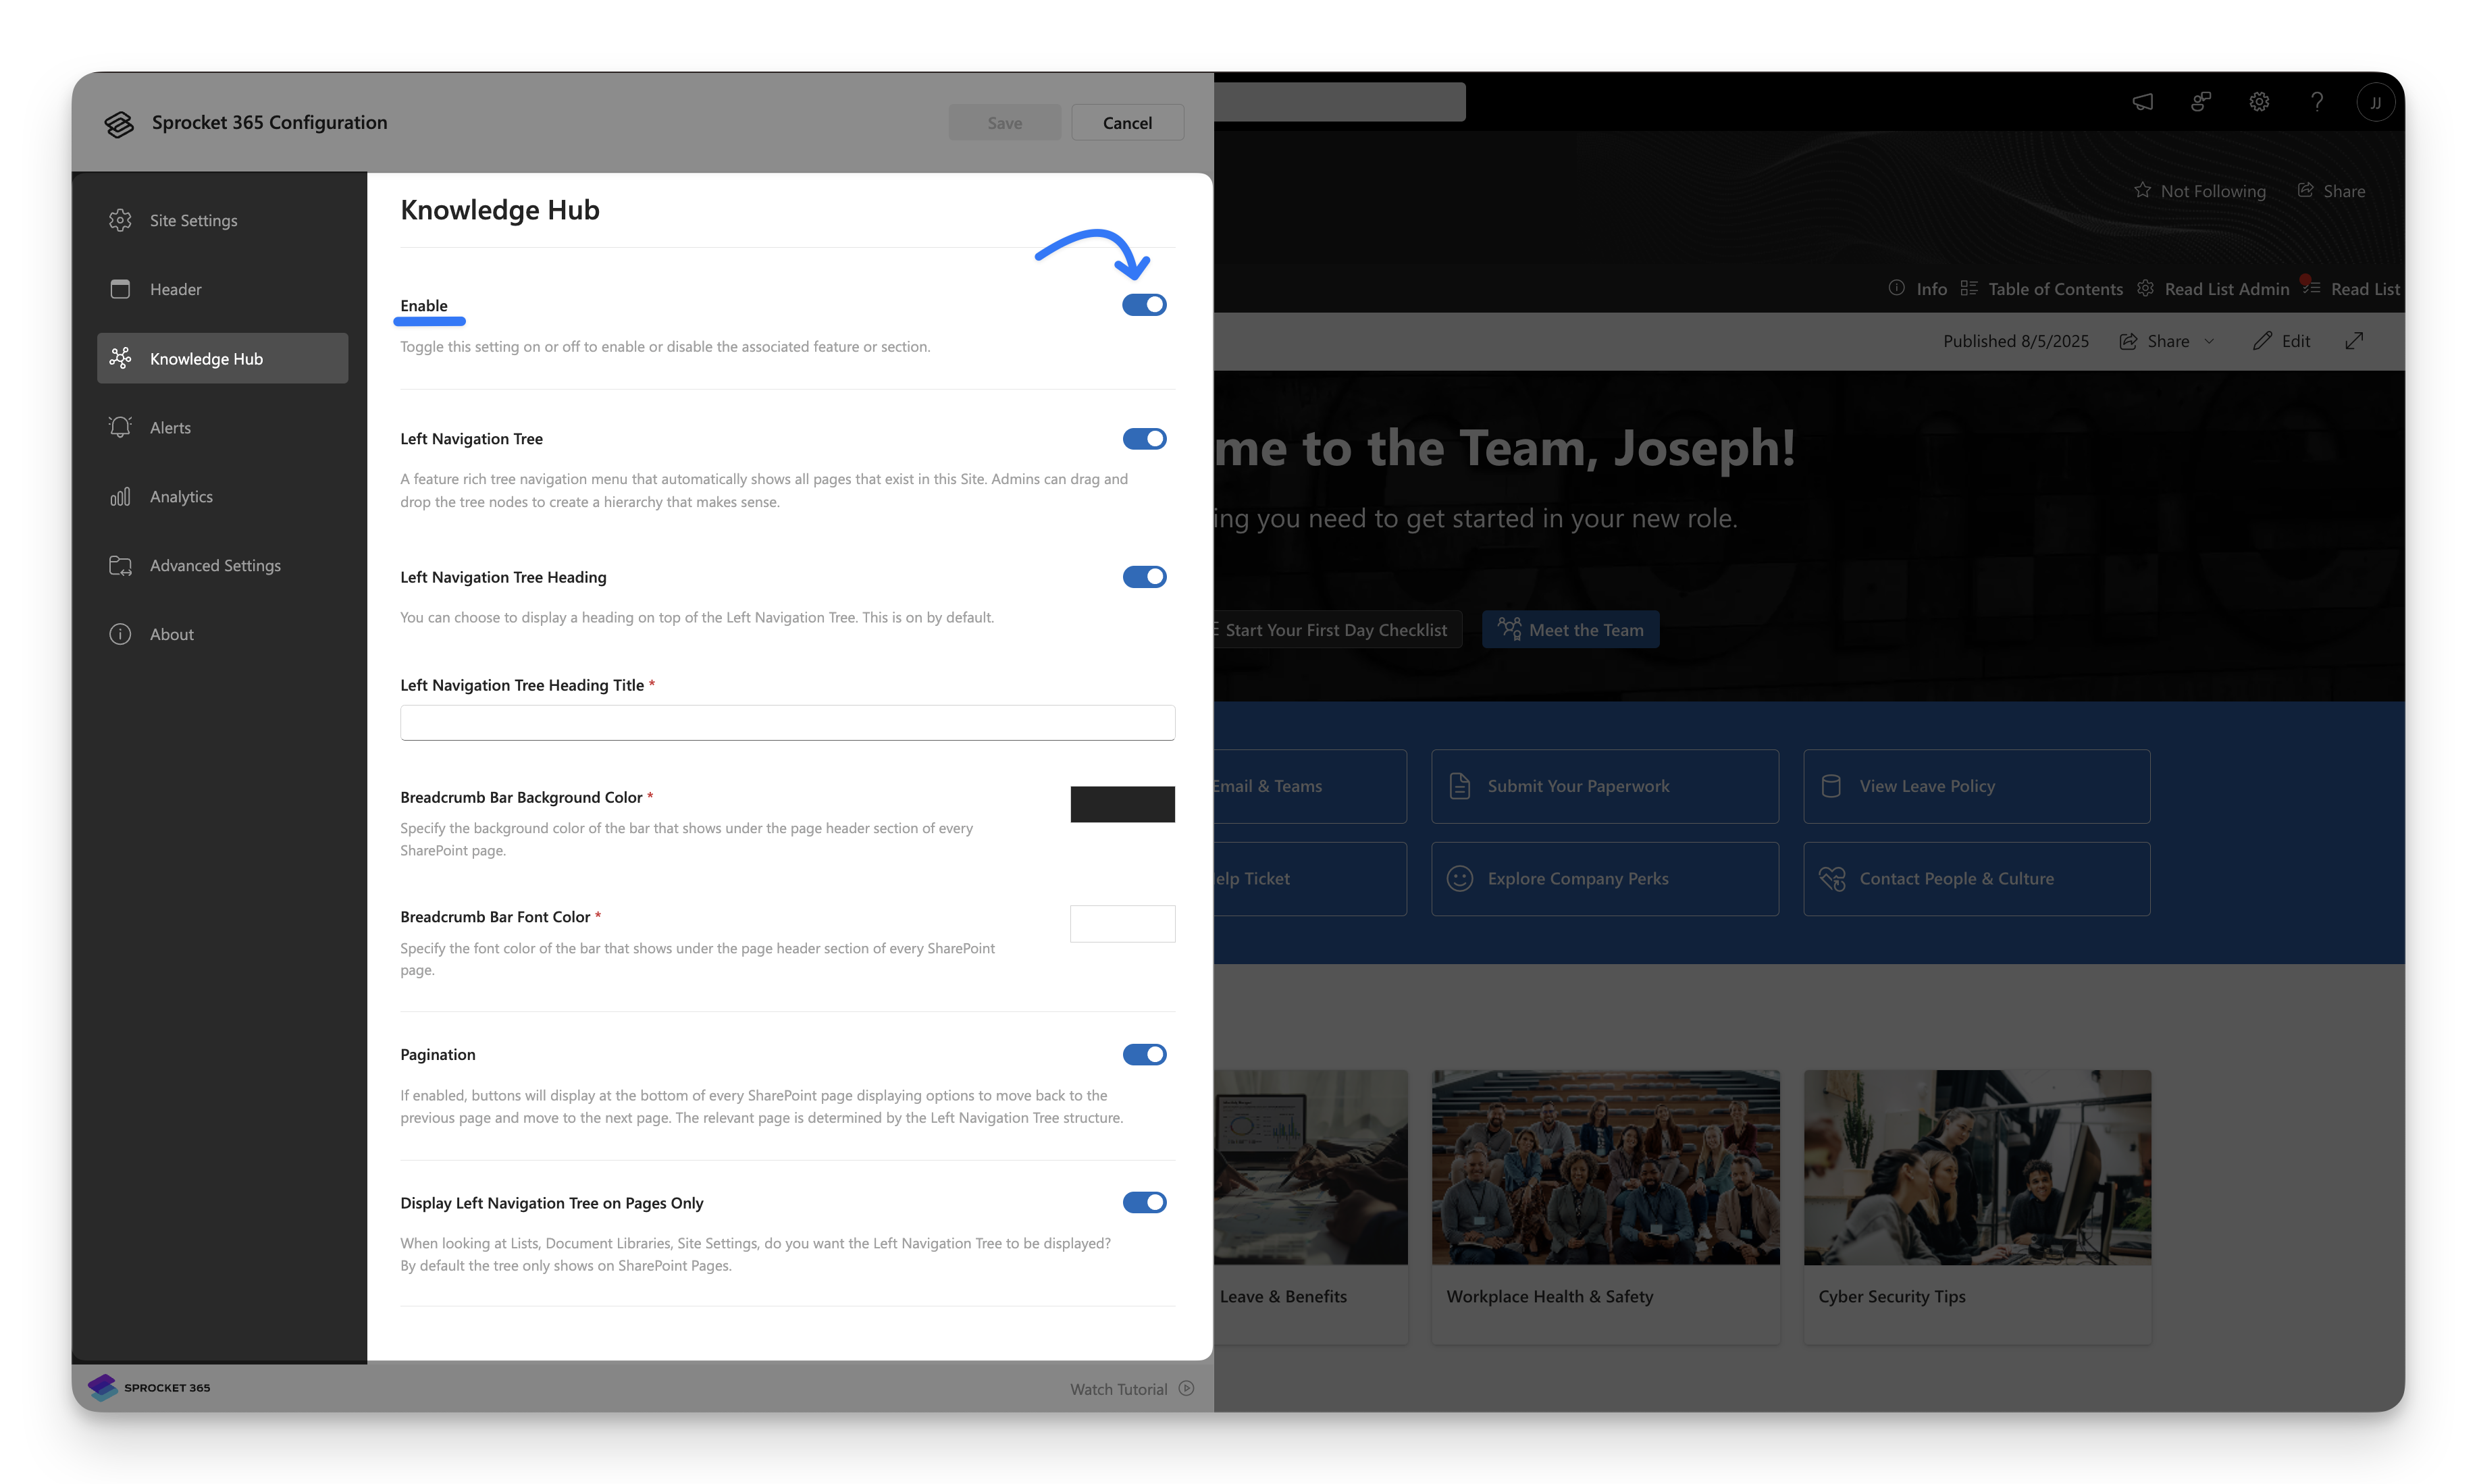
- Click the Sprocket Settings icon at the bottom left of your site.
- In the Sprocket Settings panel, navigate to the Knowledge Hub tab.
- Toggle the Enable Knowledge Hub switch to activate the feature.
2. Enabling Wiki Navigation
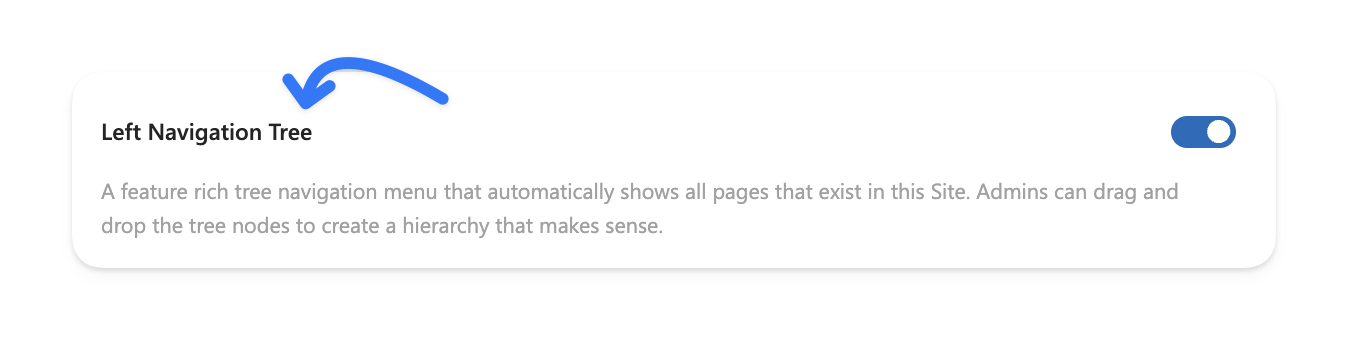
Left Navigation Tree Toggle
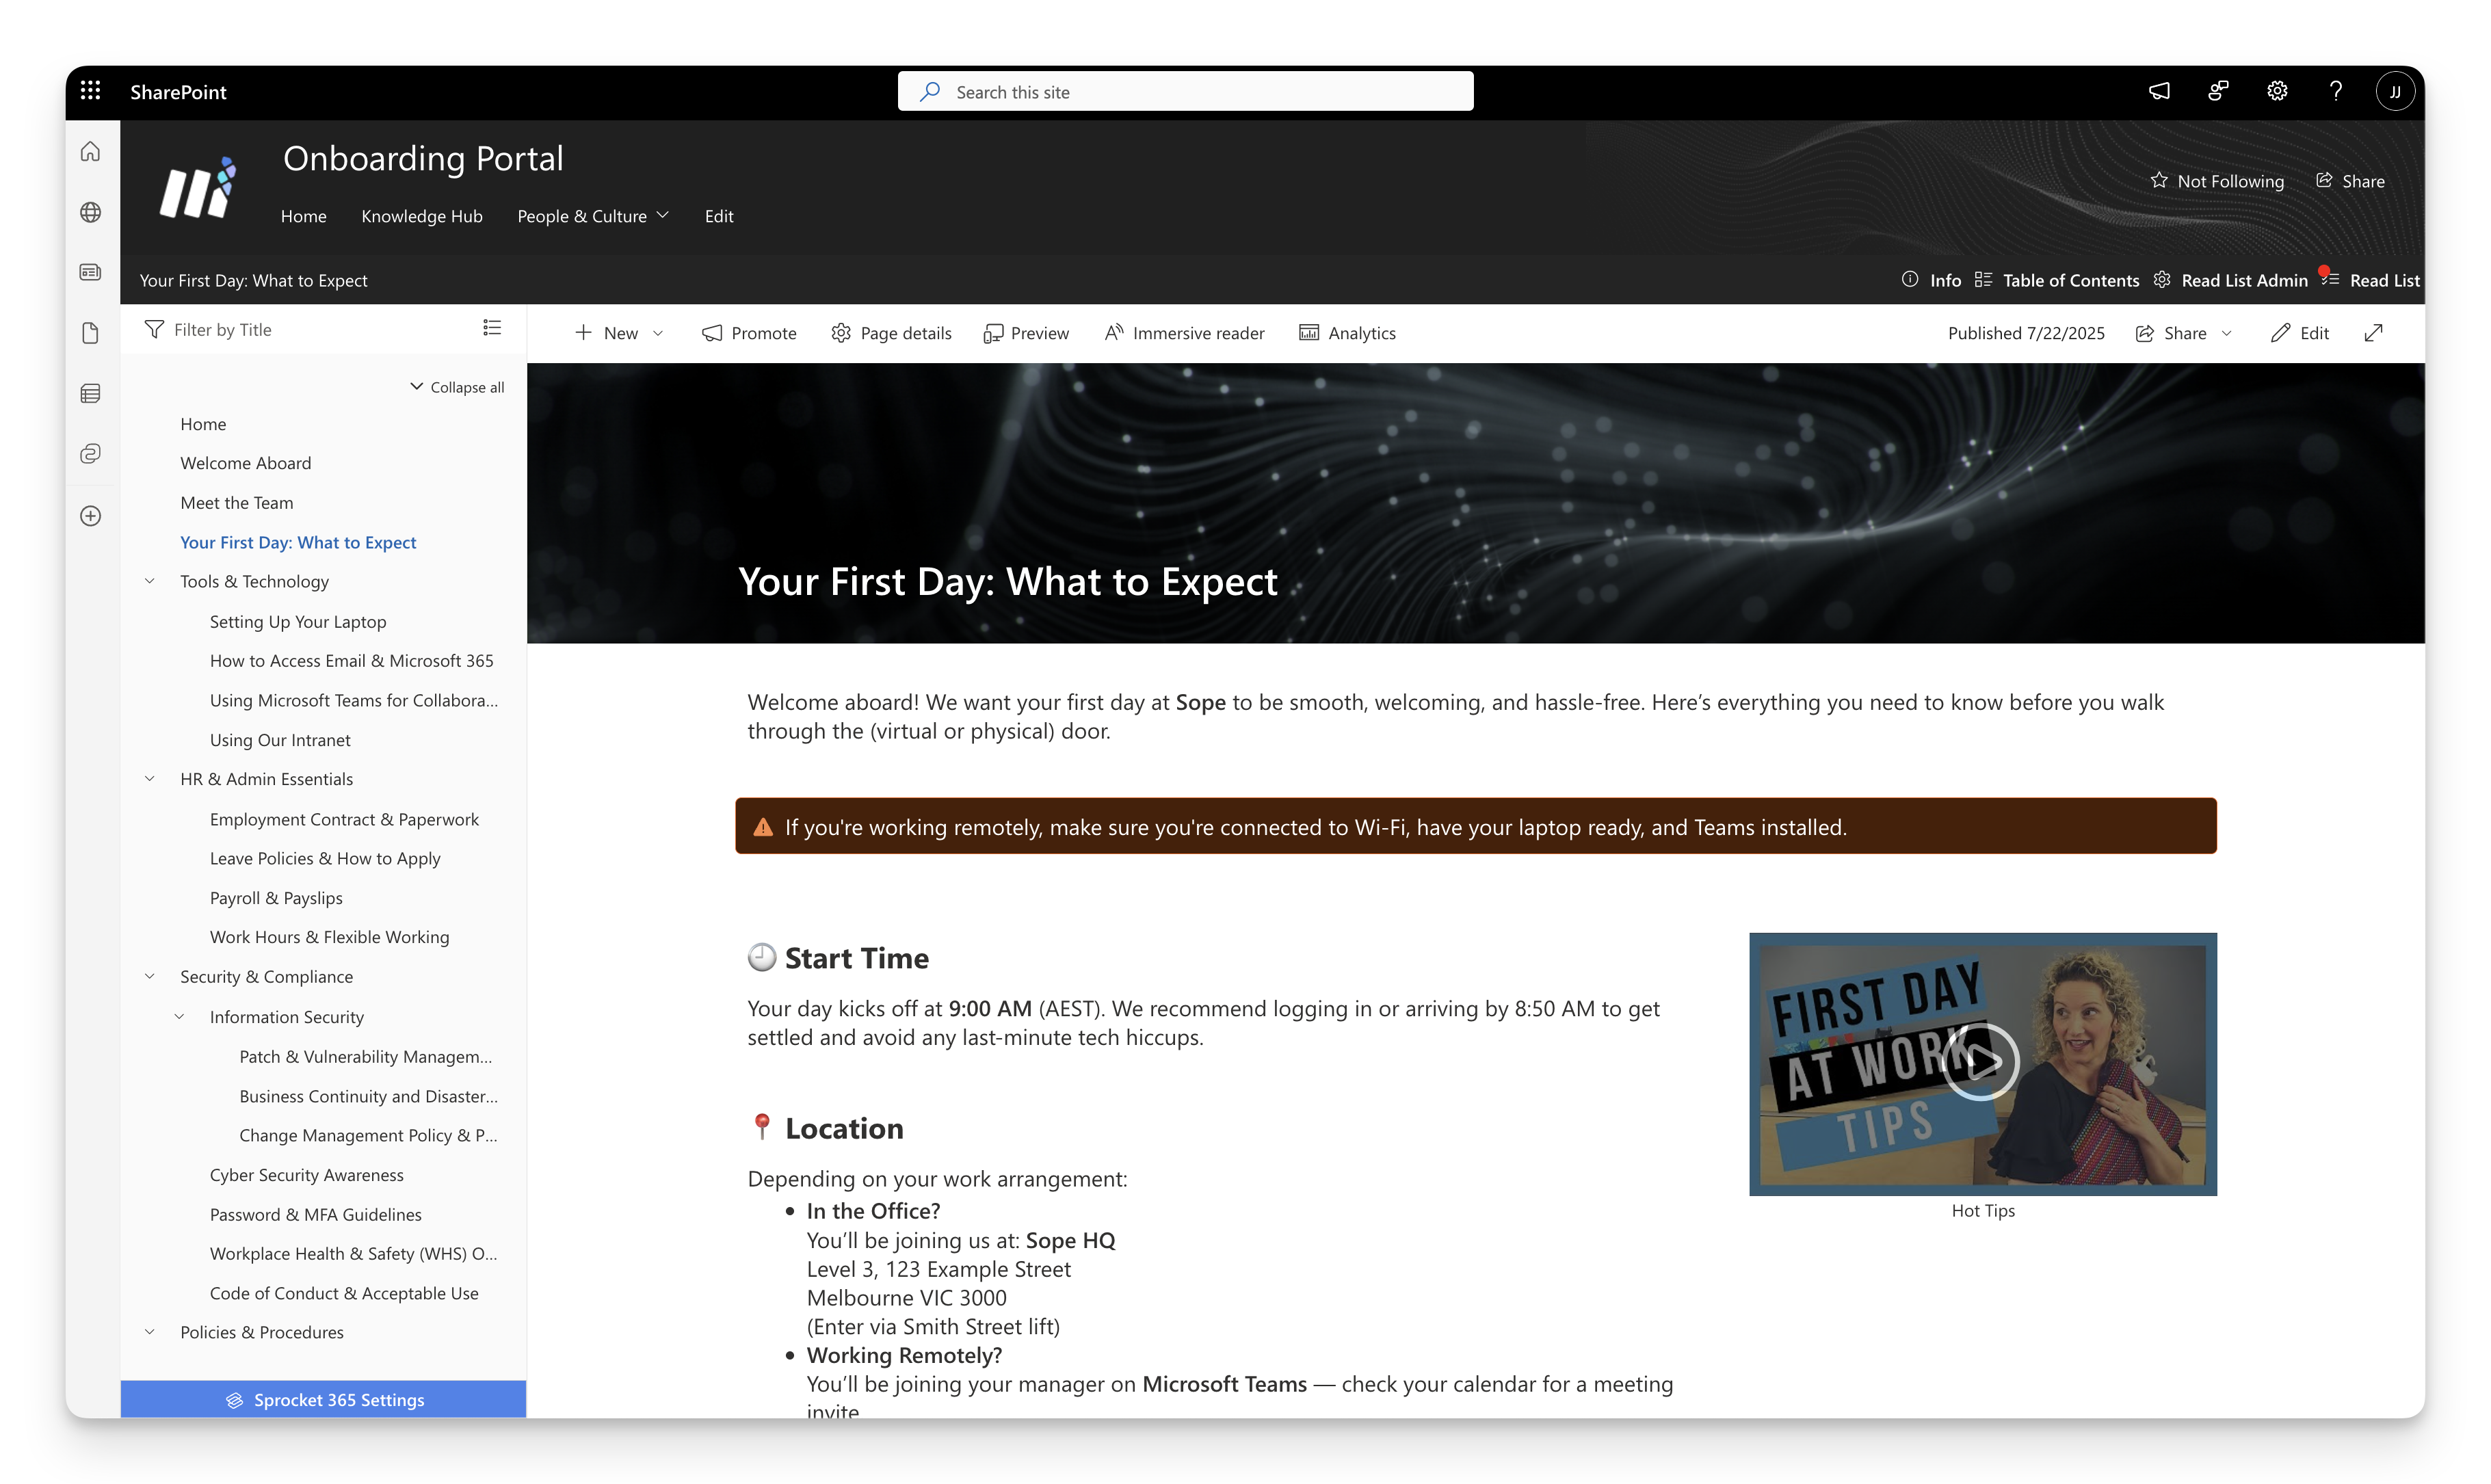
When you enable Knowledge Hub, the left navigation tree toggle is activated by default, displaying wiki-style navigation on your pages. This provides users with an intuitive sidebar that shows your knowledge base structure and allows easy navigation between related content.
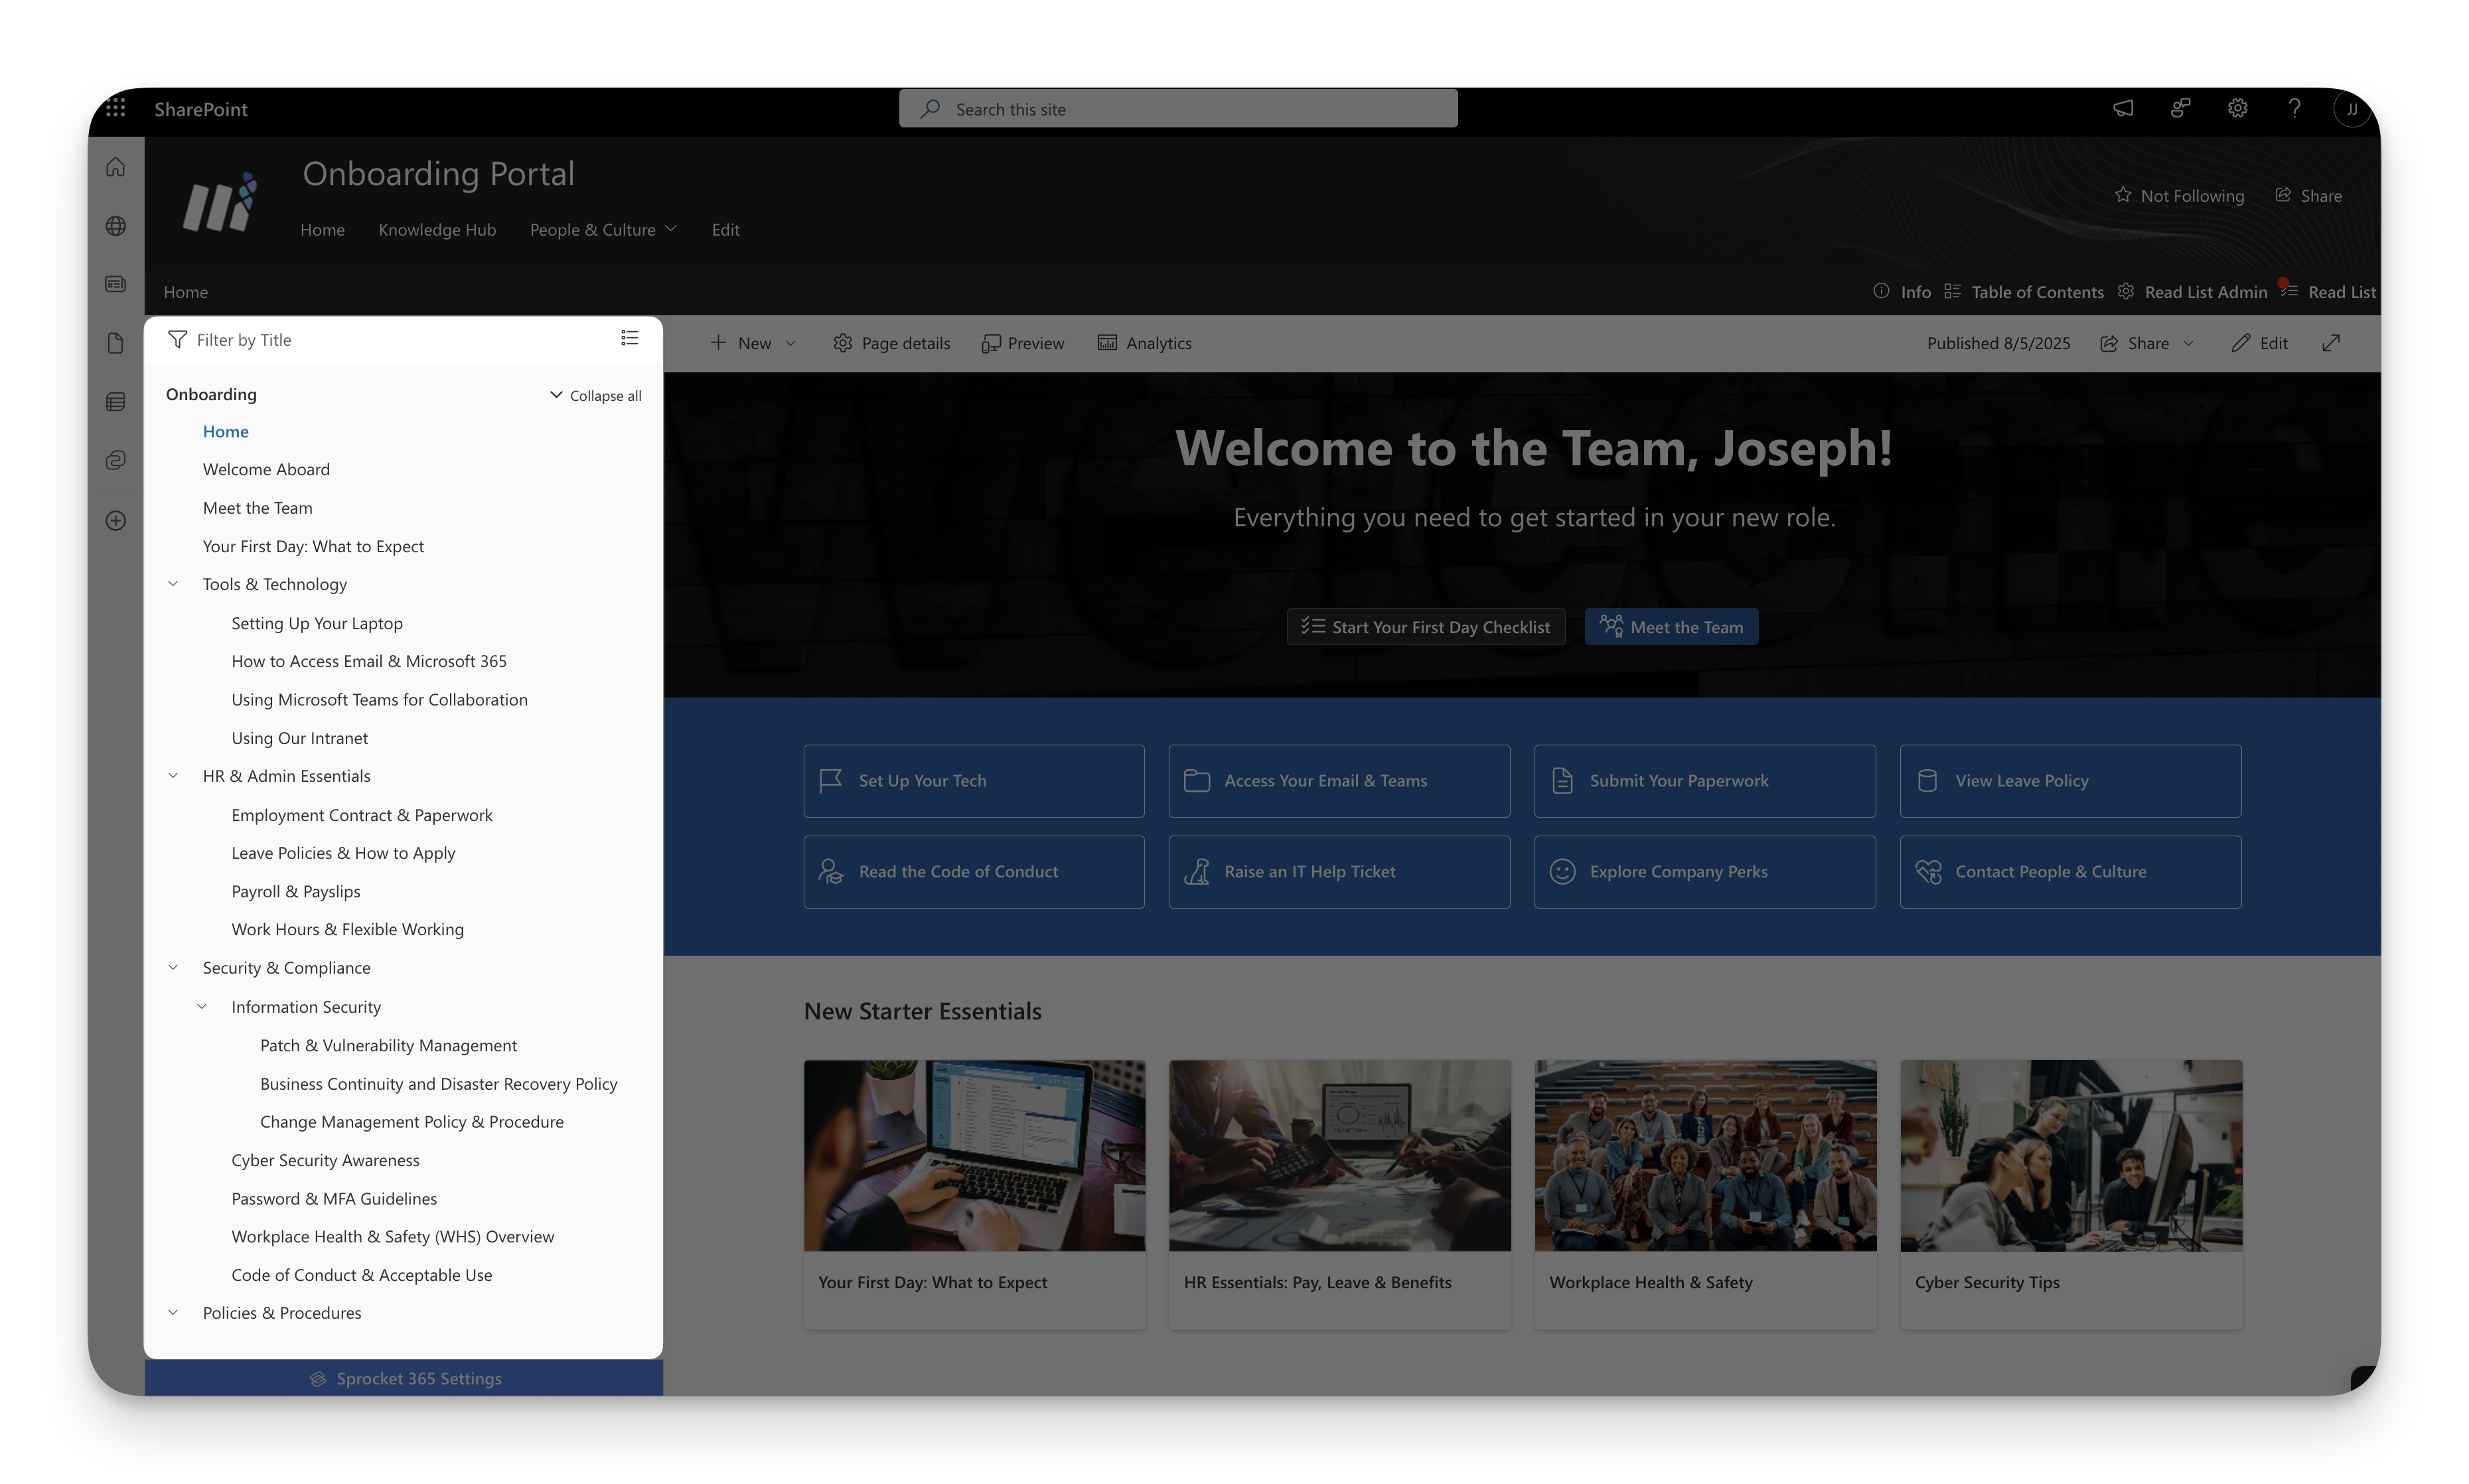
When first enabled, the navigation tree will display all existing site pages, giving you a complete overview of your current content. From here, you can drag and drop pages to build your custom knowledge hierarchy, organizing content in a way that makes sense for your team and business needs.
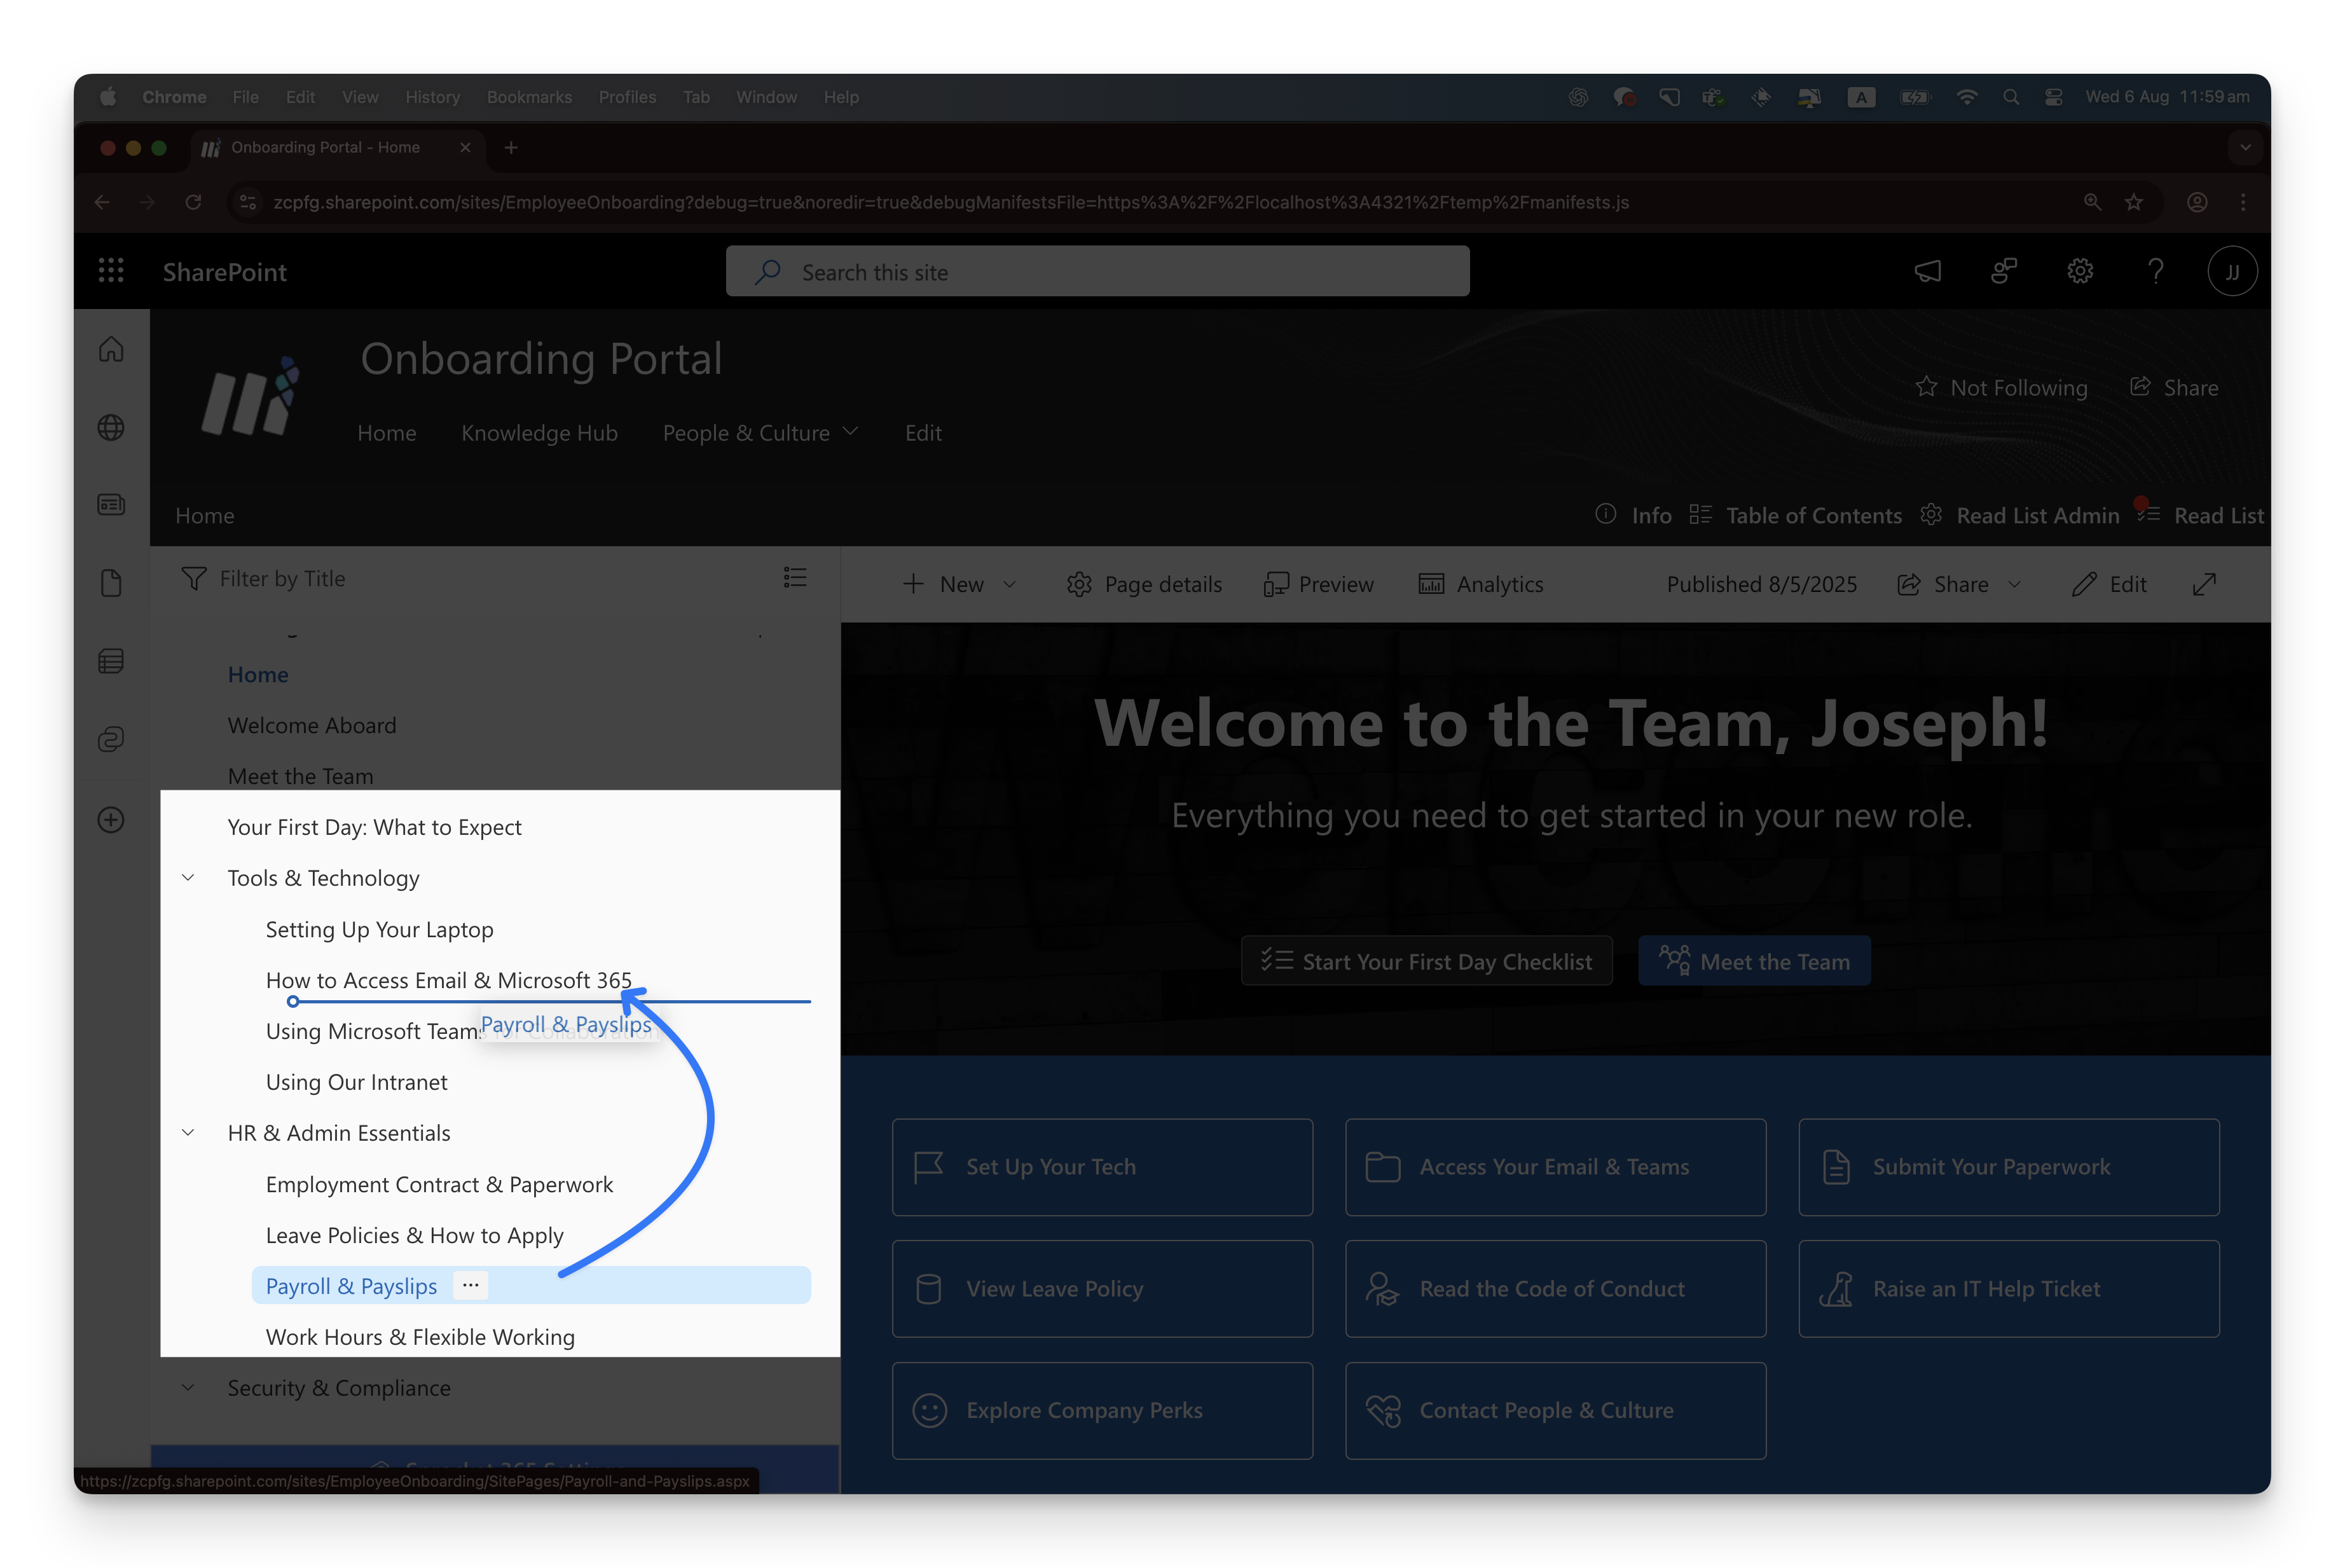
3. Drag and drop pages
Organizing your knowledge base is as simple as clicking and dragging pages in the left navigation tree. This powerful feature lets you create logical information hierarchies that mirror how your team actually thinks about and uses content.
How it works:
- Click and hold any page in the navigation tree
- Drag it to its new position in the hierarchy
- Drop it where you want it to live
Pro tip: Use placeholder headings (covered in the next section) to create folder-like groupings before adding your pages. This gives you a clean, professional structure that makes sense to everyone on your team.
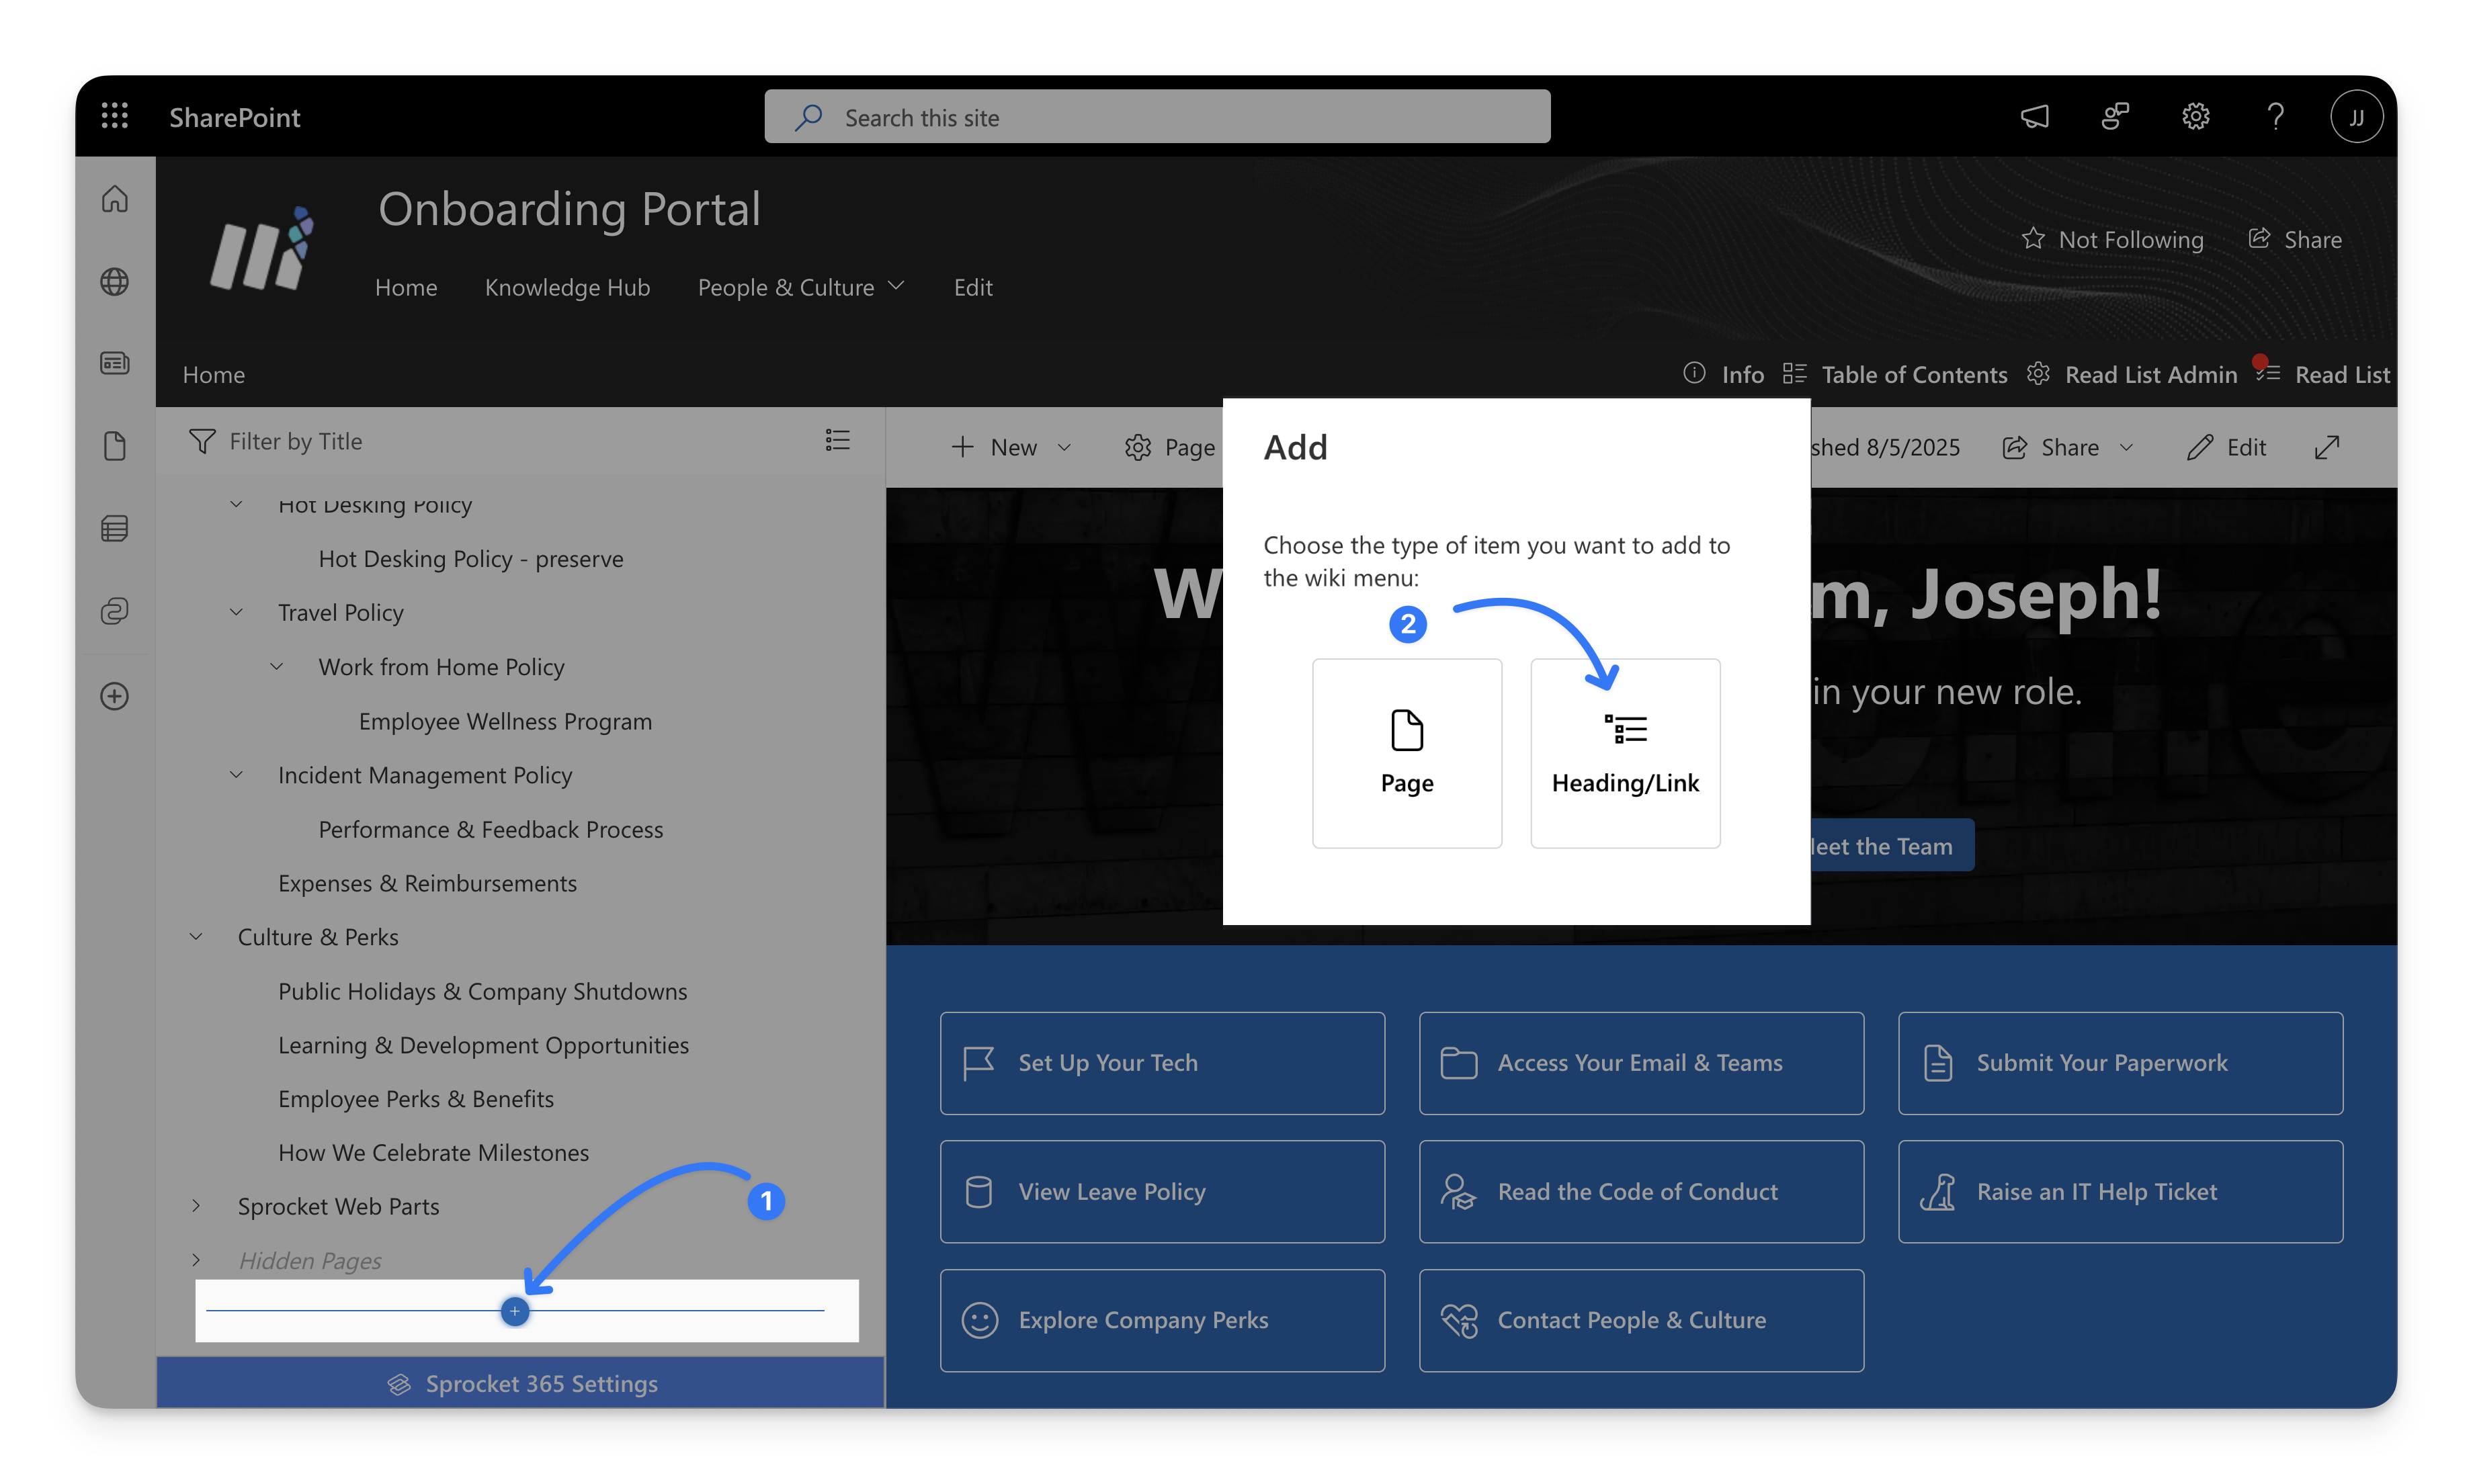
4. Add placeholder headings
Add headings to group related content into logical sections.
For example using headings, you can create meaningful structures:
- By department: Sales → Sales Training → Product Demos
- By topic: Policies → HR Policies → Benefits, Leave, Onboarding
- By priority: Critical Updates → Security Alerts → System Changes
- By process: Employee Lifecycle → Hiring → Onboarding → Development
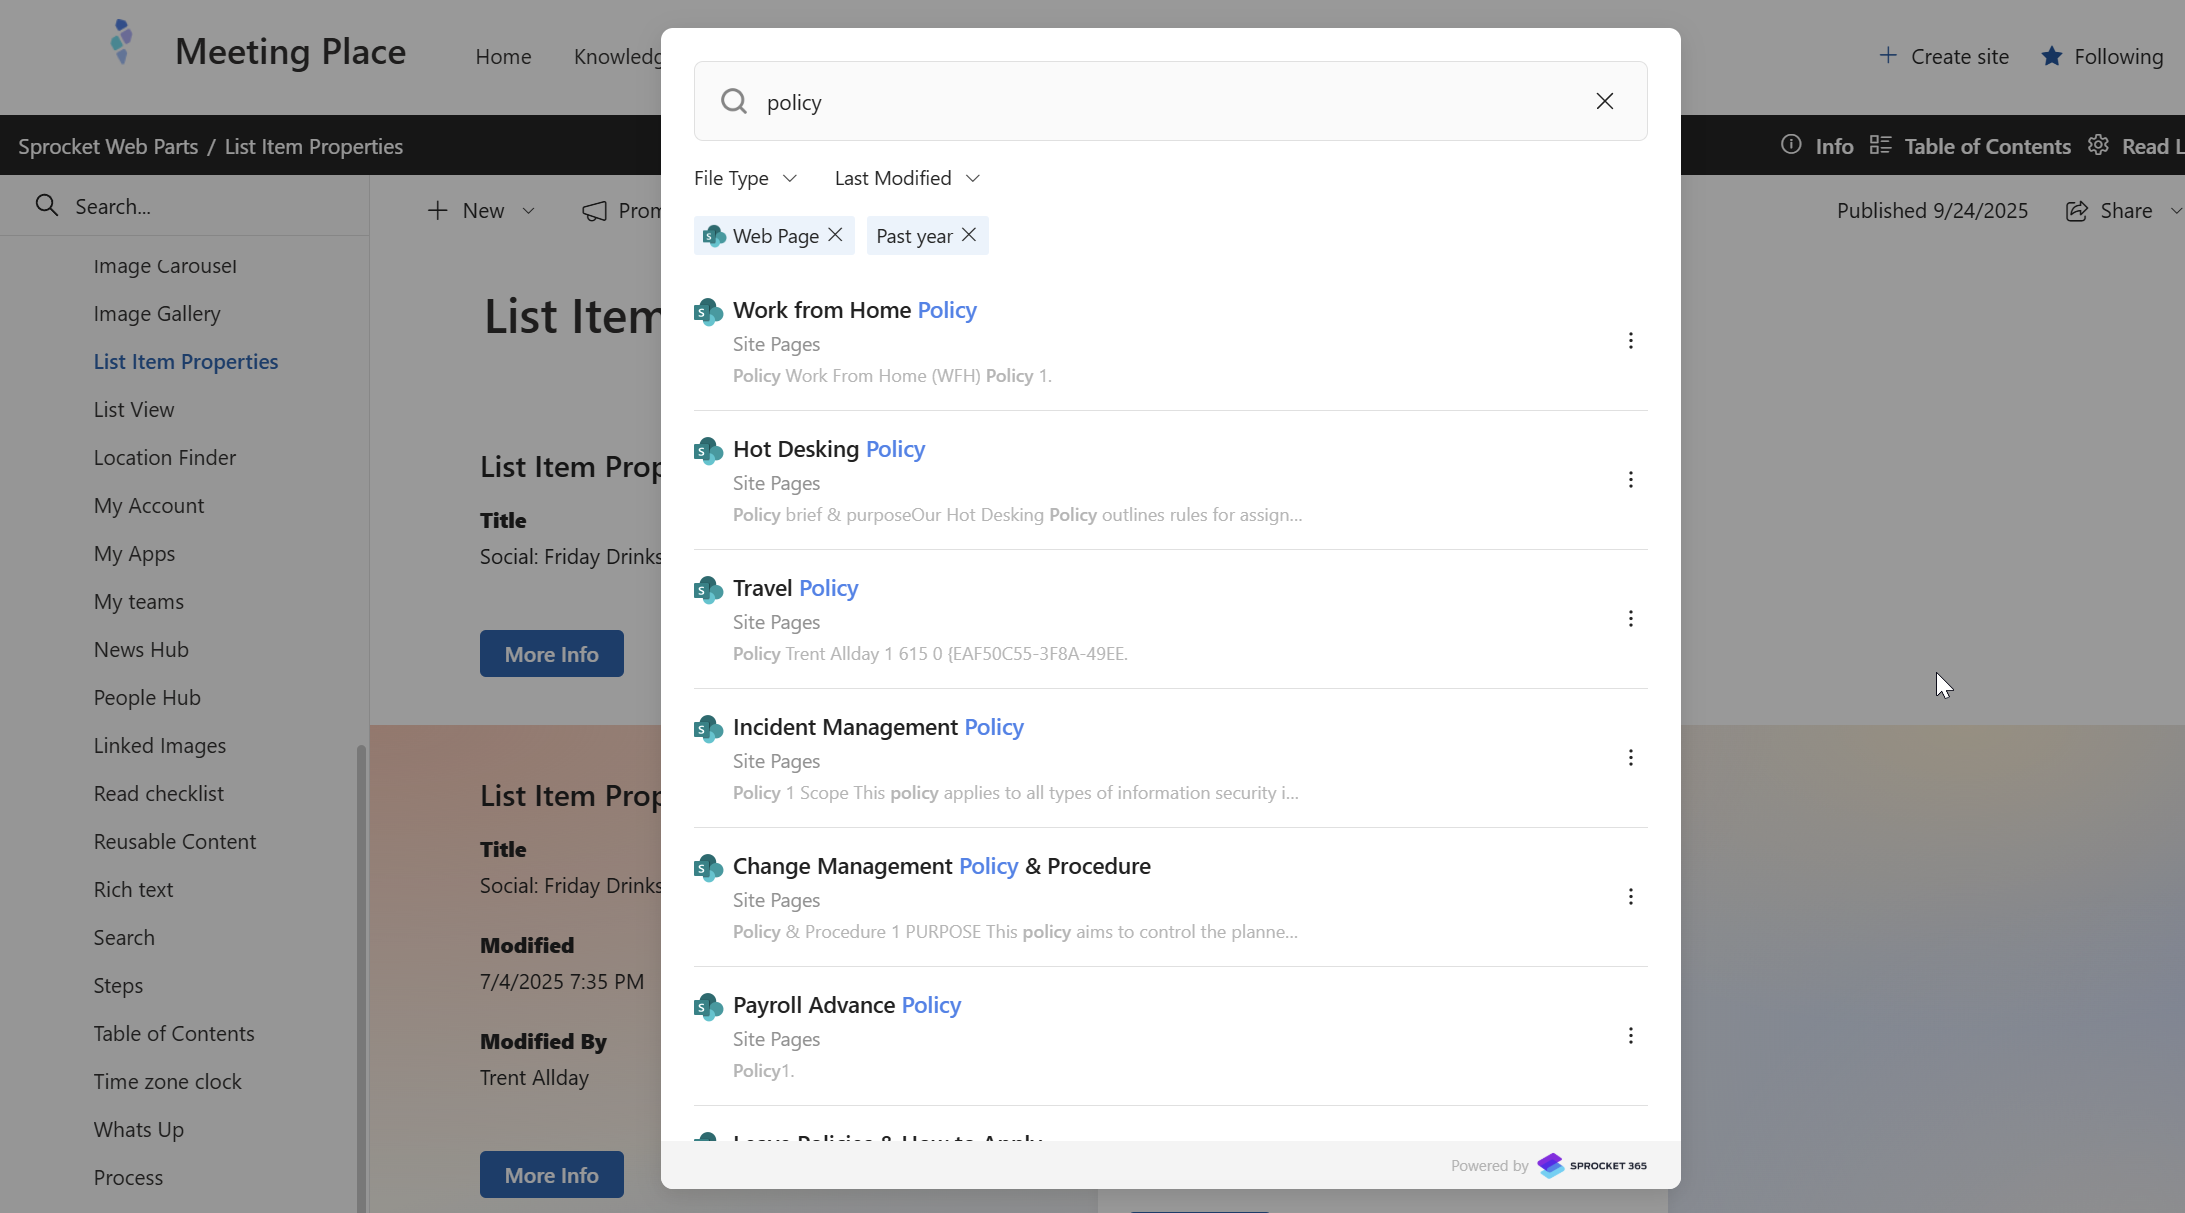
5. Search function
Use the search button in wiki navigation to help find content quickly across your knowledge base. The search functionality provides powerful, intelligent search capabilities that make finding information effortless.
How to search:
- Click the search icon in the left navigation tree
- Type your search terms in the search box (minimum 3 characters)
- Results appear instantly as you type
Smart search features:
- Recent files appear when you first open the search modal, showing your most recently accessed content
- Highlighted results show exactly where your search terms appear in the content
- Content snippets provide context around your search terms
- Breadcrumb paths show exactly where each result is located in your site
- Result options to copy the link to that document or open the document in a new tab
Advanced filtering:
- File type filters let you narrow results to specific document types (Web Pages, PDF, PowerPoint, Word, Excel)
- Date filters help you find content by when it was last modified (Past 24 hours, Past week, Past month, etc.)
- Filter combinations work together to give you precise results
Start Building Your Knowledge Base
1. Content Creation Approaches
Choose the method that works best for your existing content and workflow:
- Convert existing documents - Upload Word docs and use Document Conversion to create pages instantly
- Create new pages - Use SharePoint's page editor enhanced with Knowledge Hub navigation and Sprocket web parts
- Import from templates - Use pre-configured page templates from your site's templates folder
To build content in your Knowledge Hub pages, you can use out-of-the-box SharePoint web parts or choose from 30+ powerful Sprocket web parts. While all Sprocket web parts enhance your pages, here are some examples of how to create effective knowledge management experiences using them.
2. Sprocket Rich Text Web Part
Go beyond SharePoint's basic text editor with advanced formatting capabilities designed for professional knowledge content. Create rich, engaging pages with enhanced typography, custom layouts, and styling options that make your information more readable and visually appealing. Learn More

3. Sprocket Table of Contents Web Part
Transform long knowledge pages into easily navigable resources with dynamic table of contents generation. Automatically creates jump links from your page headings, allowing users to quickly find and navigate to specific sections without scrolling. Learn More
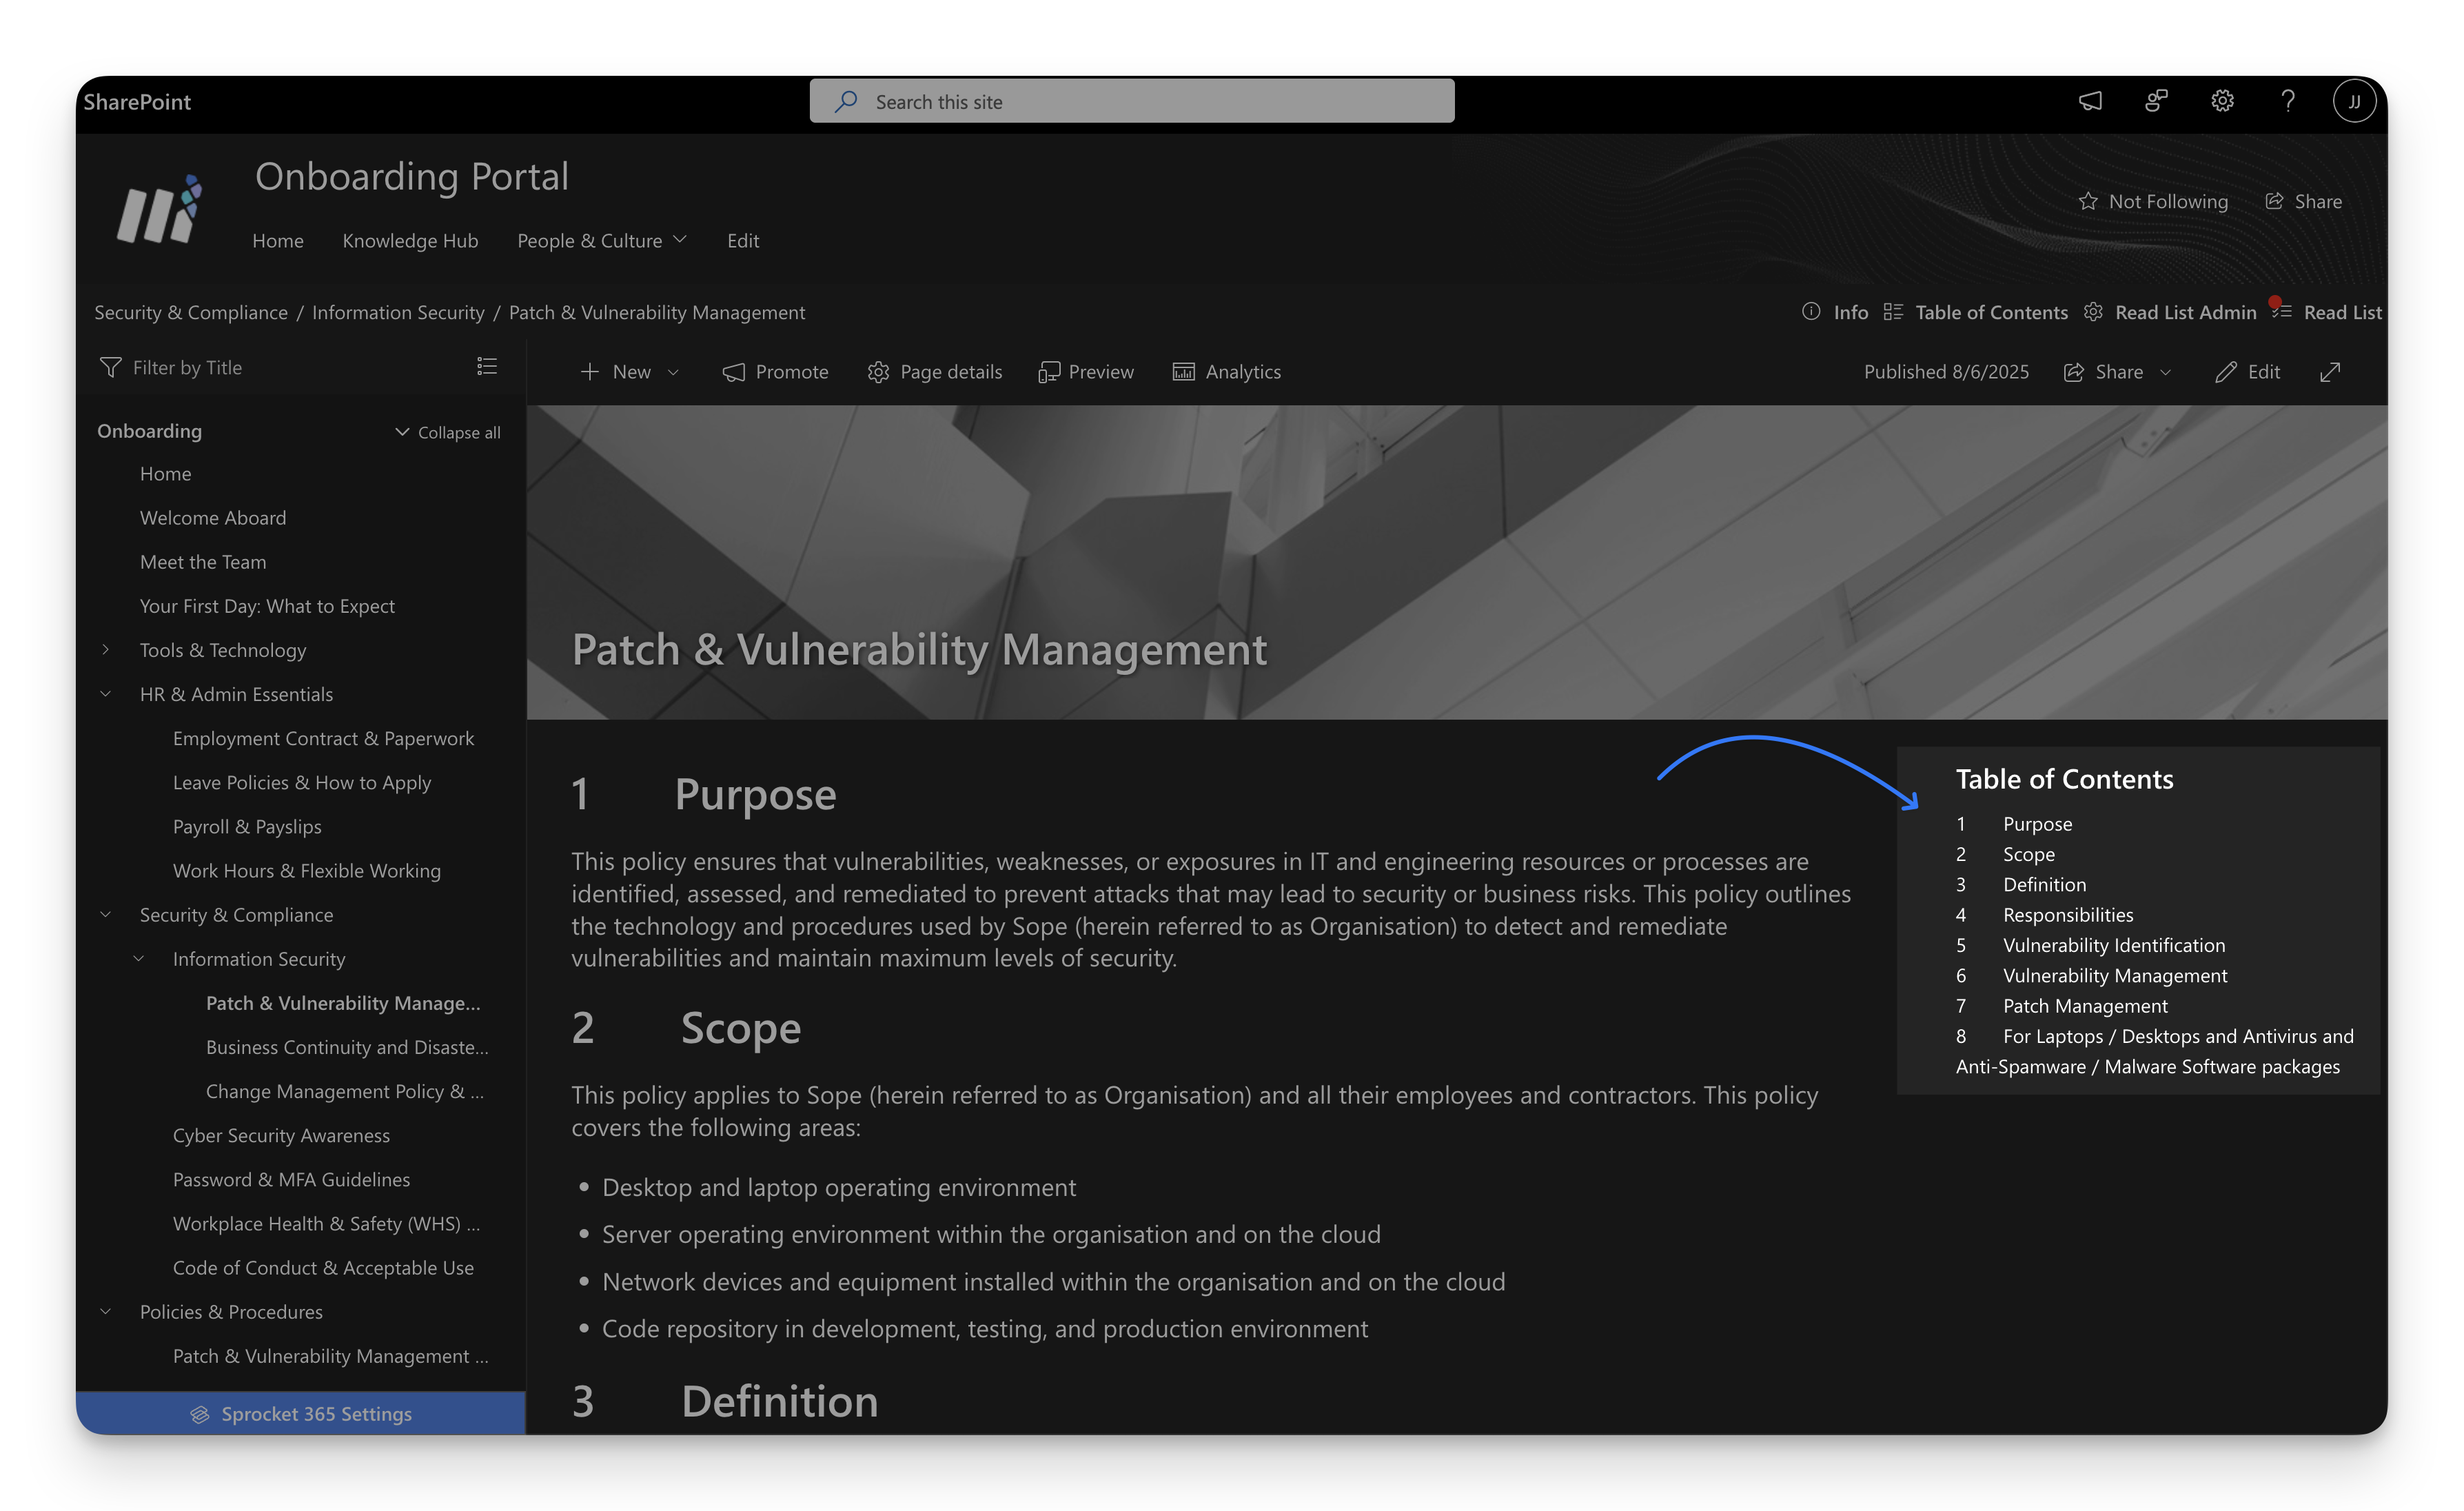
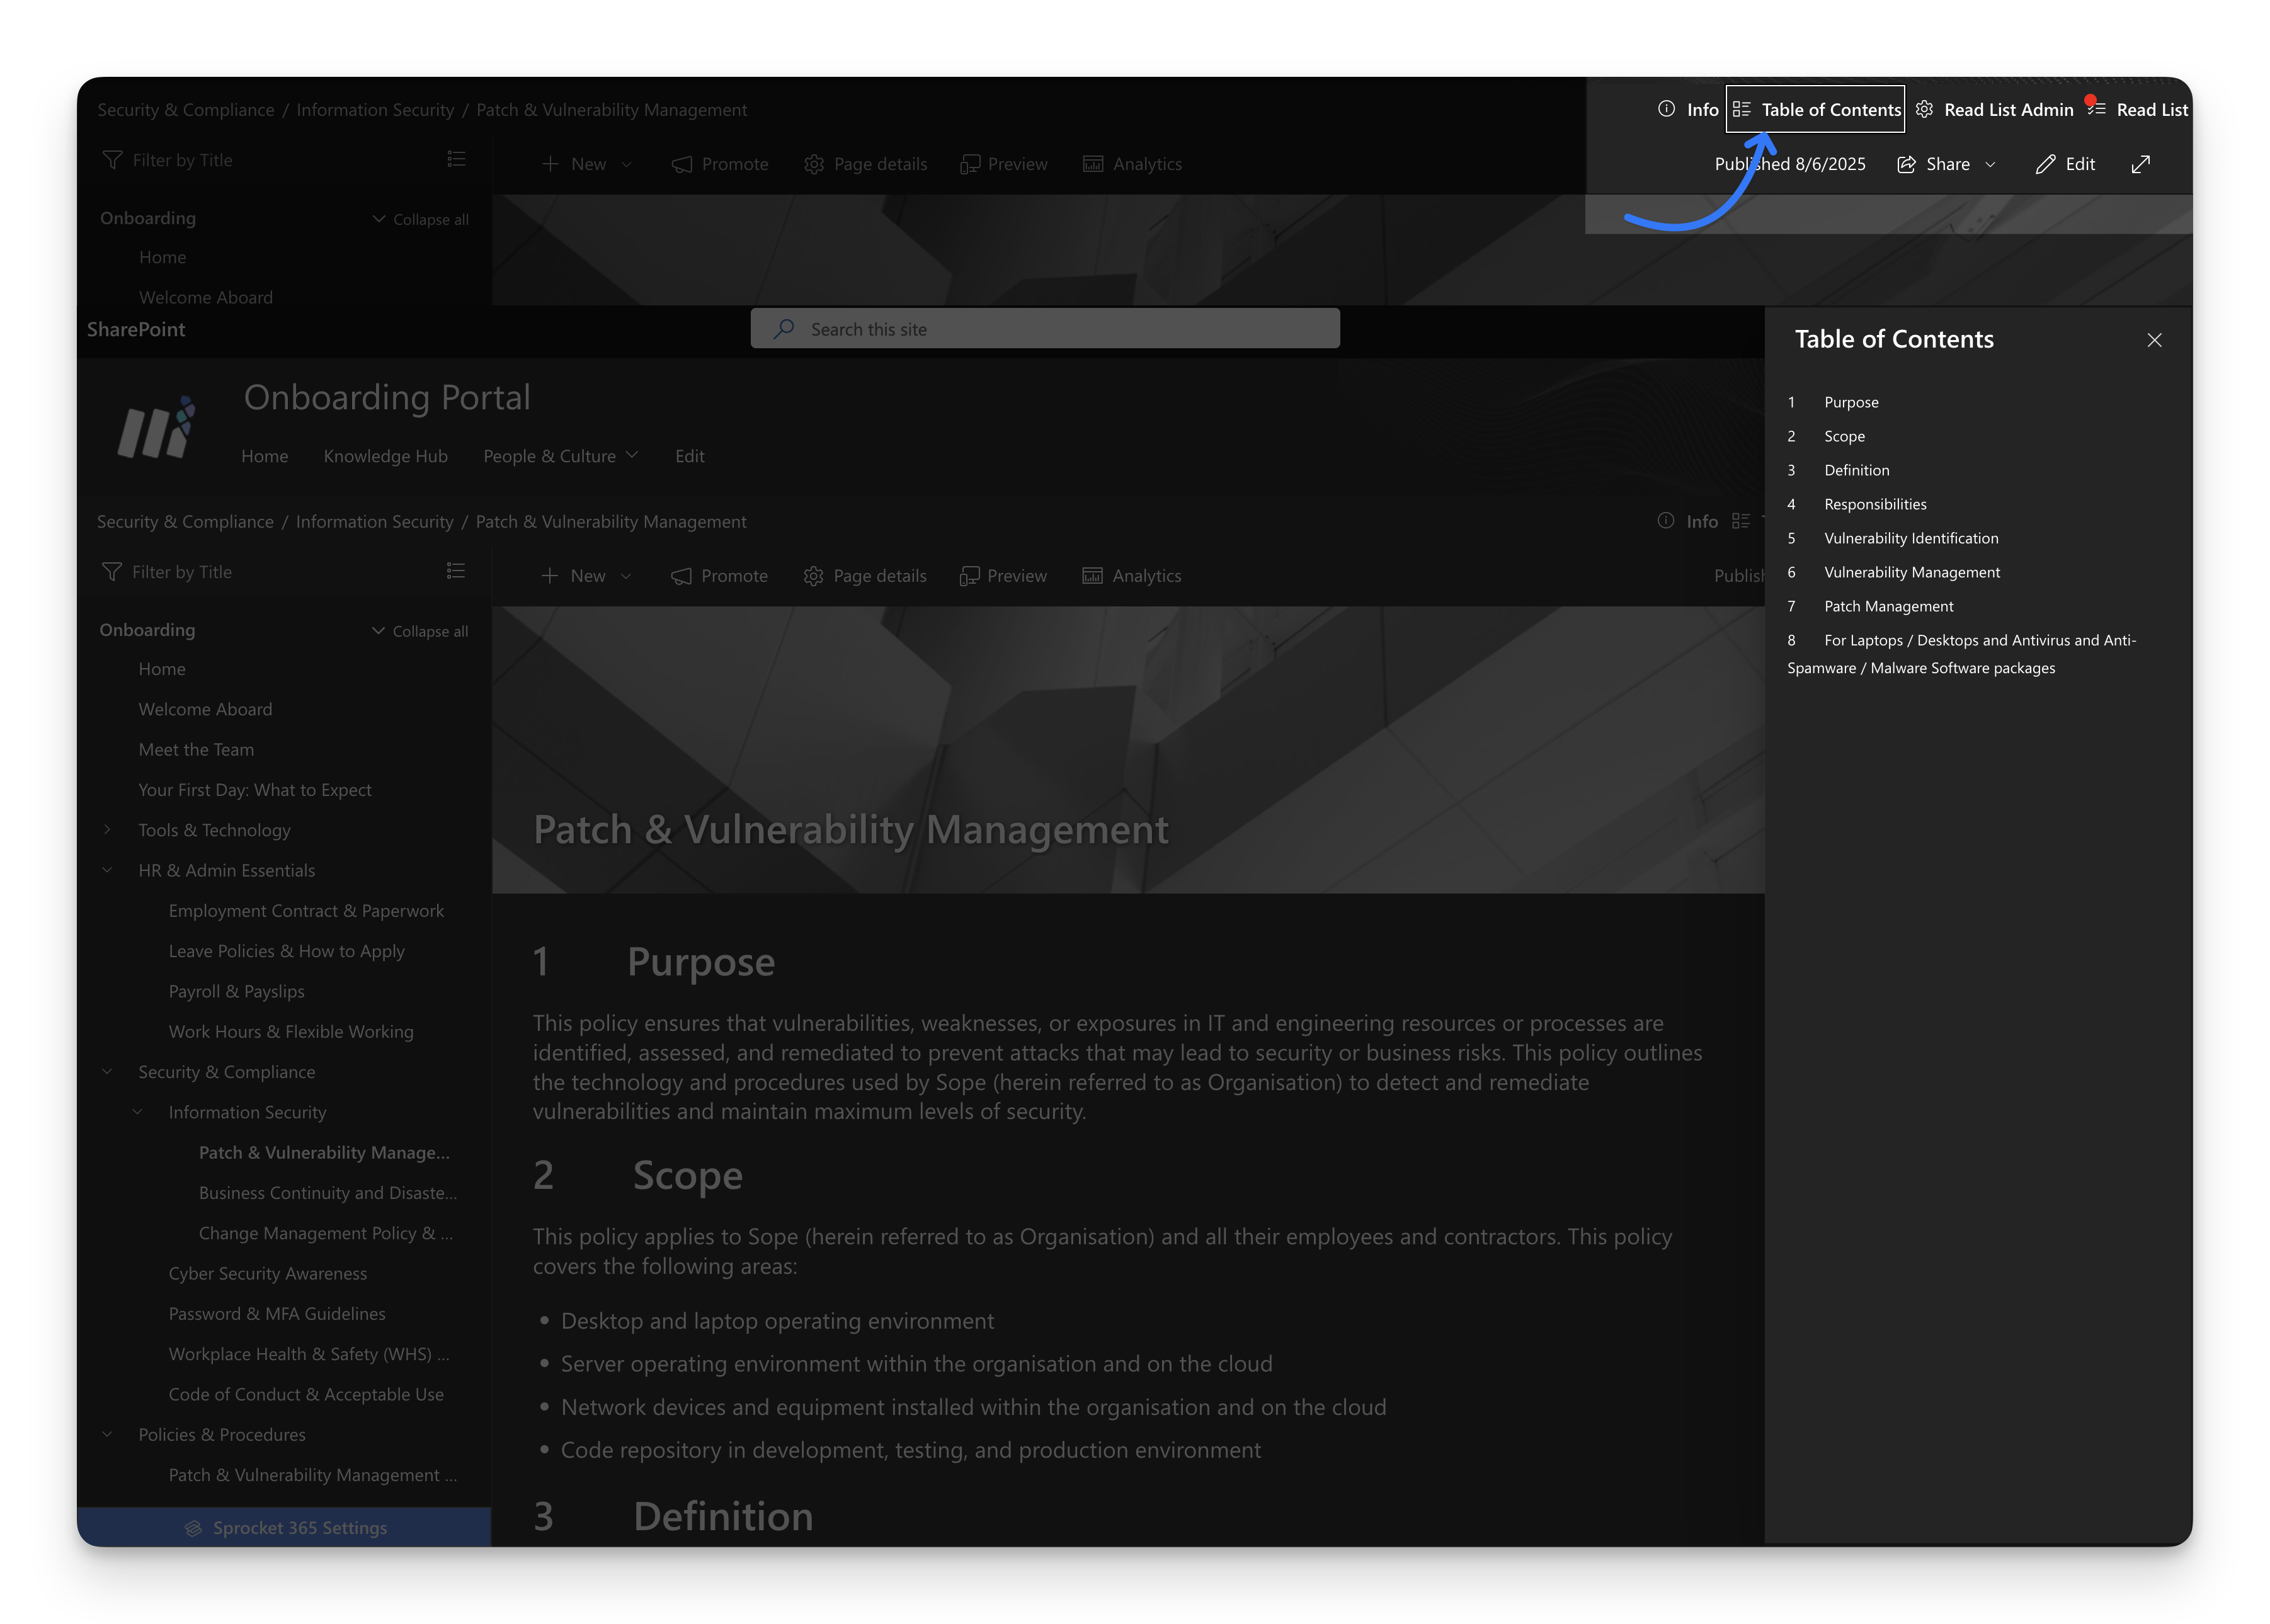
Pro Tip: Table of contents functionality is also built into Knowledge Hub's action bar. Click the "Table of Contents" button to open a convenient popup panel that displays your page's heading structure. This gives users quick access to navigation without requiring a dedicated web part on the page.
4. Sprocket Document Web Part
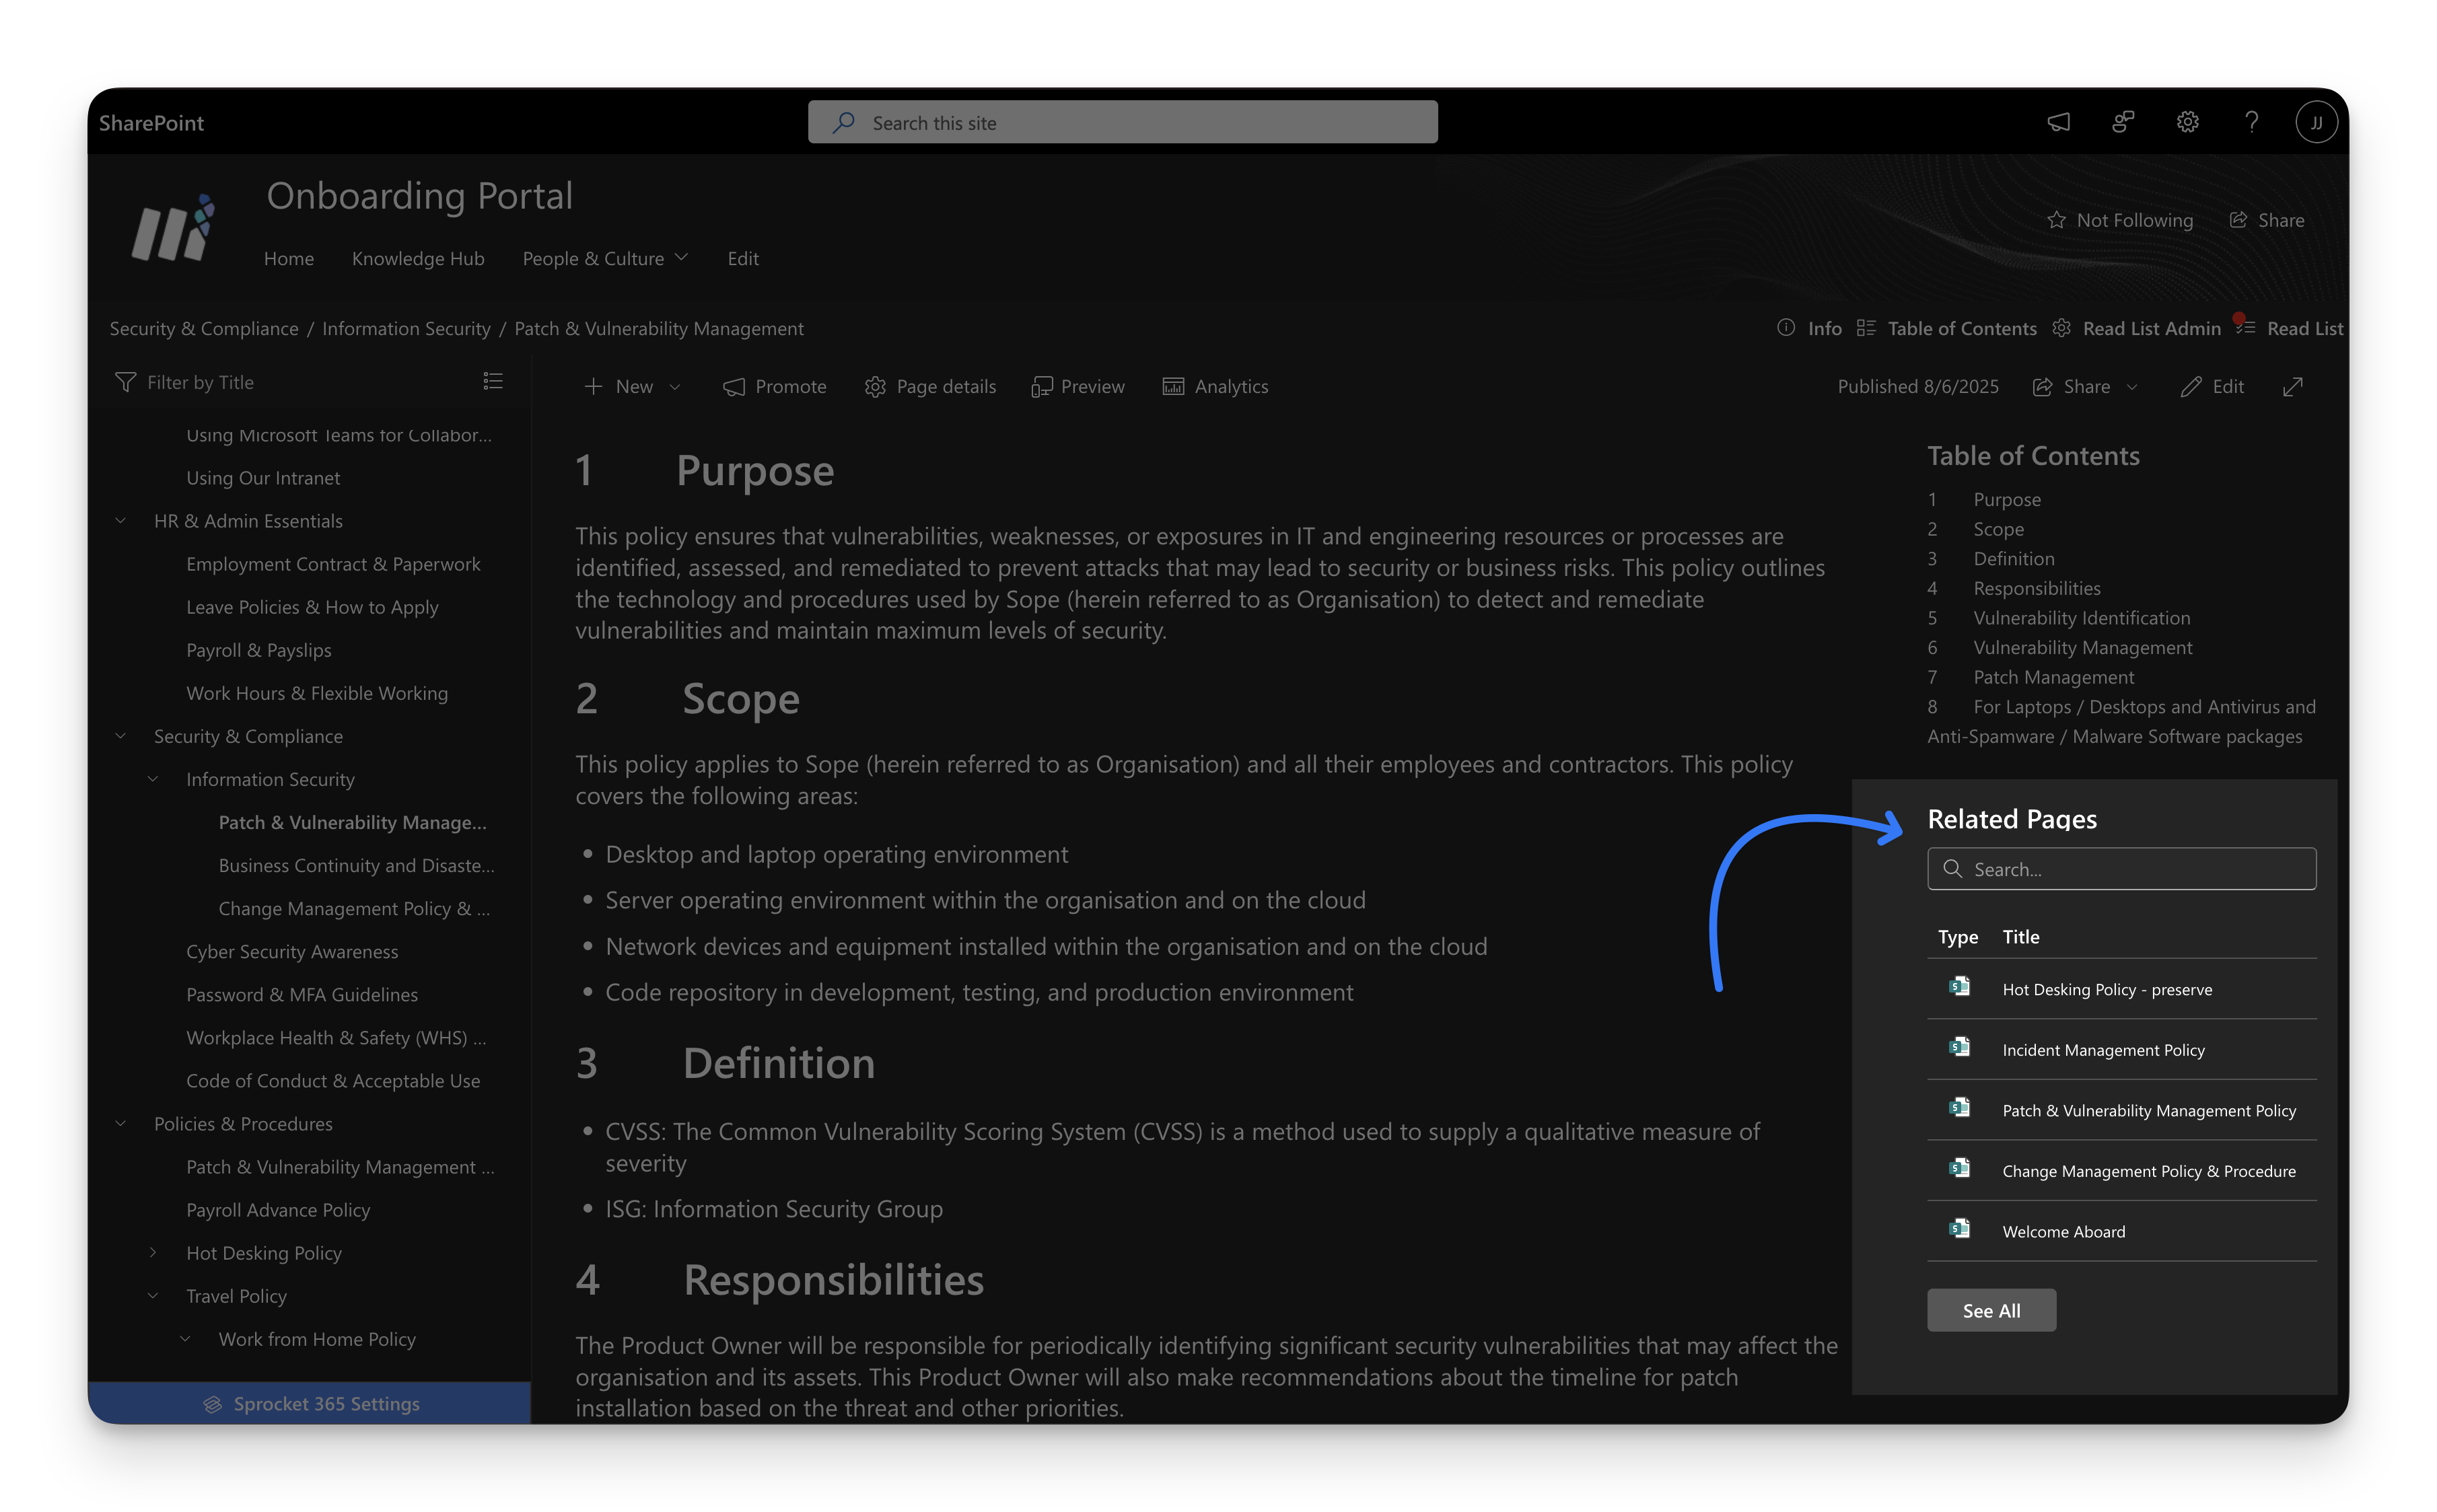
Creating Related Pages Navigation: On your Knowledge Hub pages, you can create seamless connections between related content to help users discover relevant information. Here's how to set up related pages using the Documents web part. Learn More
-
Set Up Related Pages
- Navigate to your page's Page Details settings.
- Add related pages in the Related Pages field.
- Select pages that are logically connected to your current content.
-
Display Related Pages
- Add the Sprocket Documents Web Part to your page.
- Configure it to display pages from your Related Pages field.
These three web parts are just the beginning. Explore the full library of Sprocket web parts to create rich, interactive knowledge experiences tailored to your organization's needs.
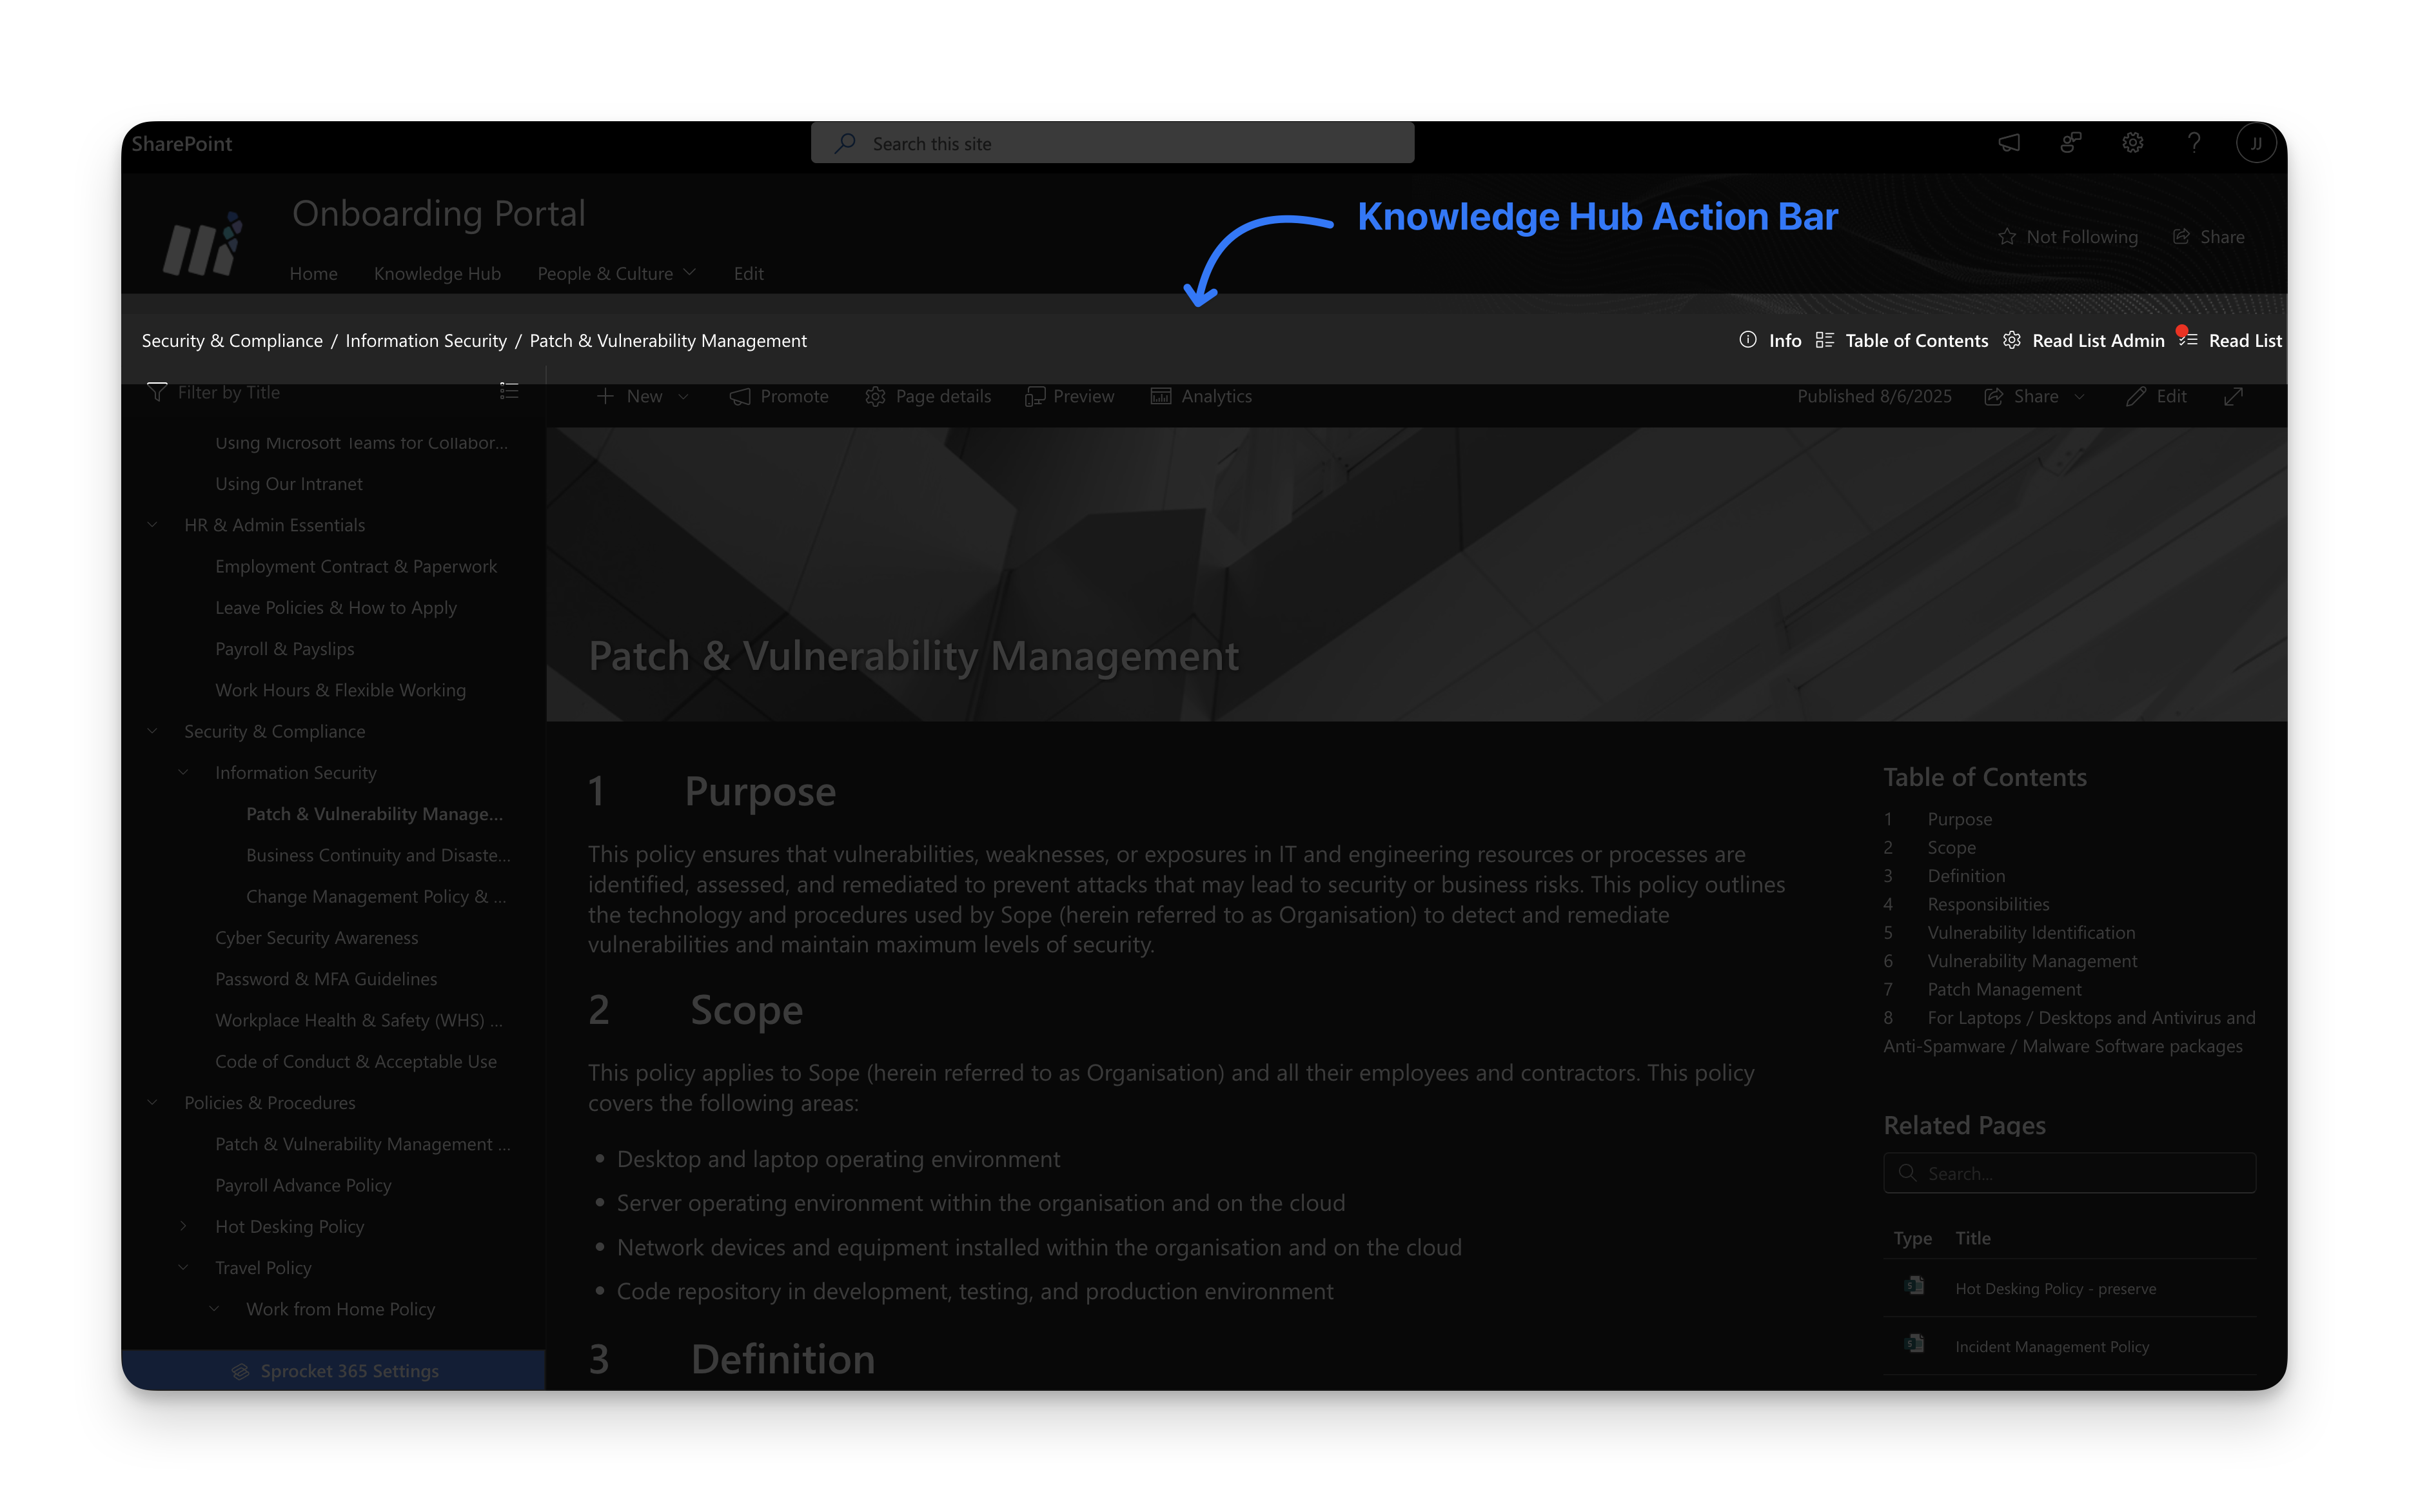
Knowledge Hub Action Bar Tools
The Knowledge Hub action bar provides quick access to essential page management and navigation tools:
| Tool | Description | Key Features |
|---|---|---|
| Breadcrumbs | Navigate your hierarchy with clickable links | Shows current page location, clickable navigation path |
| Page Information | Comprehensive page management tools | Copy shareable links, print pages, delete (with permissions), view analytics (word count, read count, last modified) |
| PDF Export | Download pages as formatted PDFs | Requires KH PDF field in Page Details |
| Table of Contents | Auto-generated navigation from page headings | Accessible via breadcrumb toolbar, opens convenient popup panel |
| Read List | Compliance and reading tracking | View assigned read lists, mark pages as read, track completion status |
Page Navigation
The Page Navigation feature provides Previous/Next navigation buttons that help users move sequentially through your Knowledge Hub content based on the left navigation tree structure. This makes it easy for readers to follow a learning path or document flow without returning to the navigation menu.
Navigation Location Options
You can configure where the navigation buttons appear on your pages. Choose the option that best fits your content layout and user preferences:
| Location | Description | Best For |
|---|---|---|
| Both | Navigation buttons appear at both the top (in the breadcrumb bar) and bottom of the page | Long pages where users benefit from quick navigation at both positions |
| Bottom Of The Page | Navigation buttons appear only at the bottom of the page content | Traditional reading flow where users navigate after finishing the page |
| Breadcrumb Bar | Navigation buttons appear only in the action bar at the top | Compact layouts or when you want prominent navigation controls |
Configuring Page Navigation
To enable and configure page navigation:
- Click the Sprocket Settings icon at the bottom left of your site
- Navigate to the Knowledge Hub tab
- Under the Pagination section, toggle the switch to On
- Select your preferred location from the dropdown:
- Both - Show navigation at top and bottom
- Bottom Of The Page - Show navigation at bottom only (default)
- Breadcrumb Bar - Show navigation in action bar only
- Click Save to apply your changes
The navigation order follows your left navigation tree structure, making it easy for users to progress through related content in a logical sequence.