Installing Sprocket via SharePoint App Catalog
Prerequisites
- Start a free trial from https://app.sprocket365.com/.
- A global admin or SharePoint admin is capable of installing the application.
- The application's features function through APIs, and global admins have the authority to enable these APIs.
This article describes the installation of Sprocket to your entire Microsoft 365 tenant, so that Sprocket is automatically available in all your sites. If you prefer to control which sites have access to Sprocket, you have two options:
- Install to the tenant App Catalog without deploying to all sites (recommended) - Follow this guide but don't check the box in step 6, then manually add Sprocket to specific sites.
- Install to a Site Collection App Catalog - Deploy only to individual site collections using PowerShell.
For more information, see Installing on Individual Sites.
Installation Steps
Downloading Sprocket installation files
Log into your Sprocket Dashboard using your work Microsoft credentials.
-
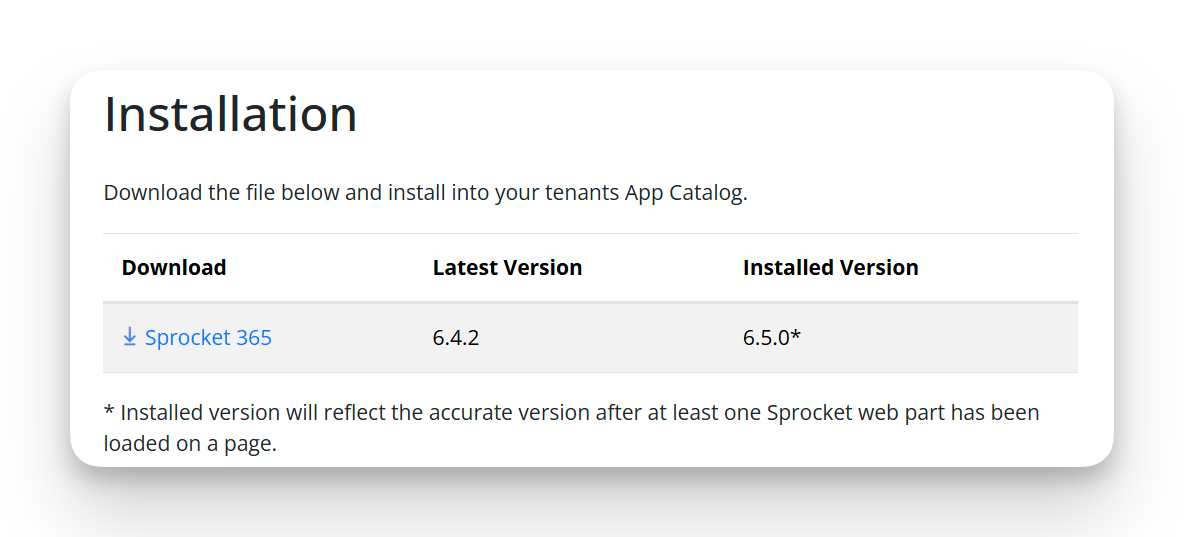
Click the Sprocket 365 link to download the cab file.
-
Log in to your SharePoint admin center using Microsoft credentials.
-
Click the Navigation Menu on the left and from options, select More features.
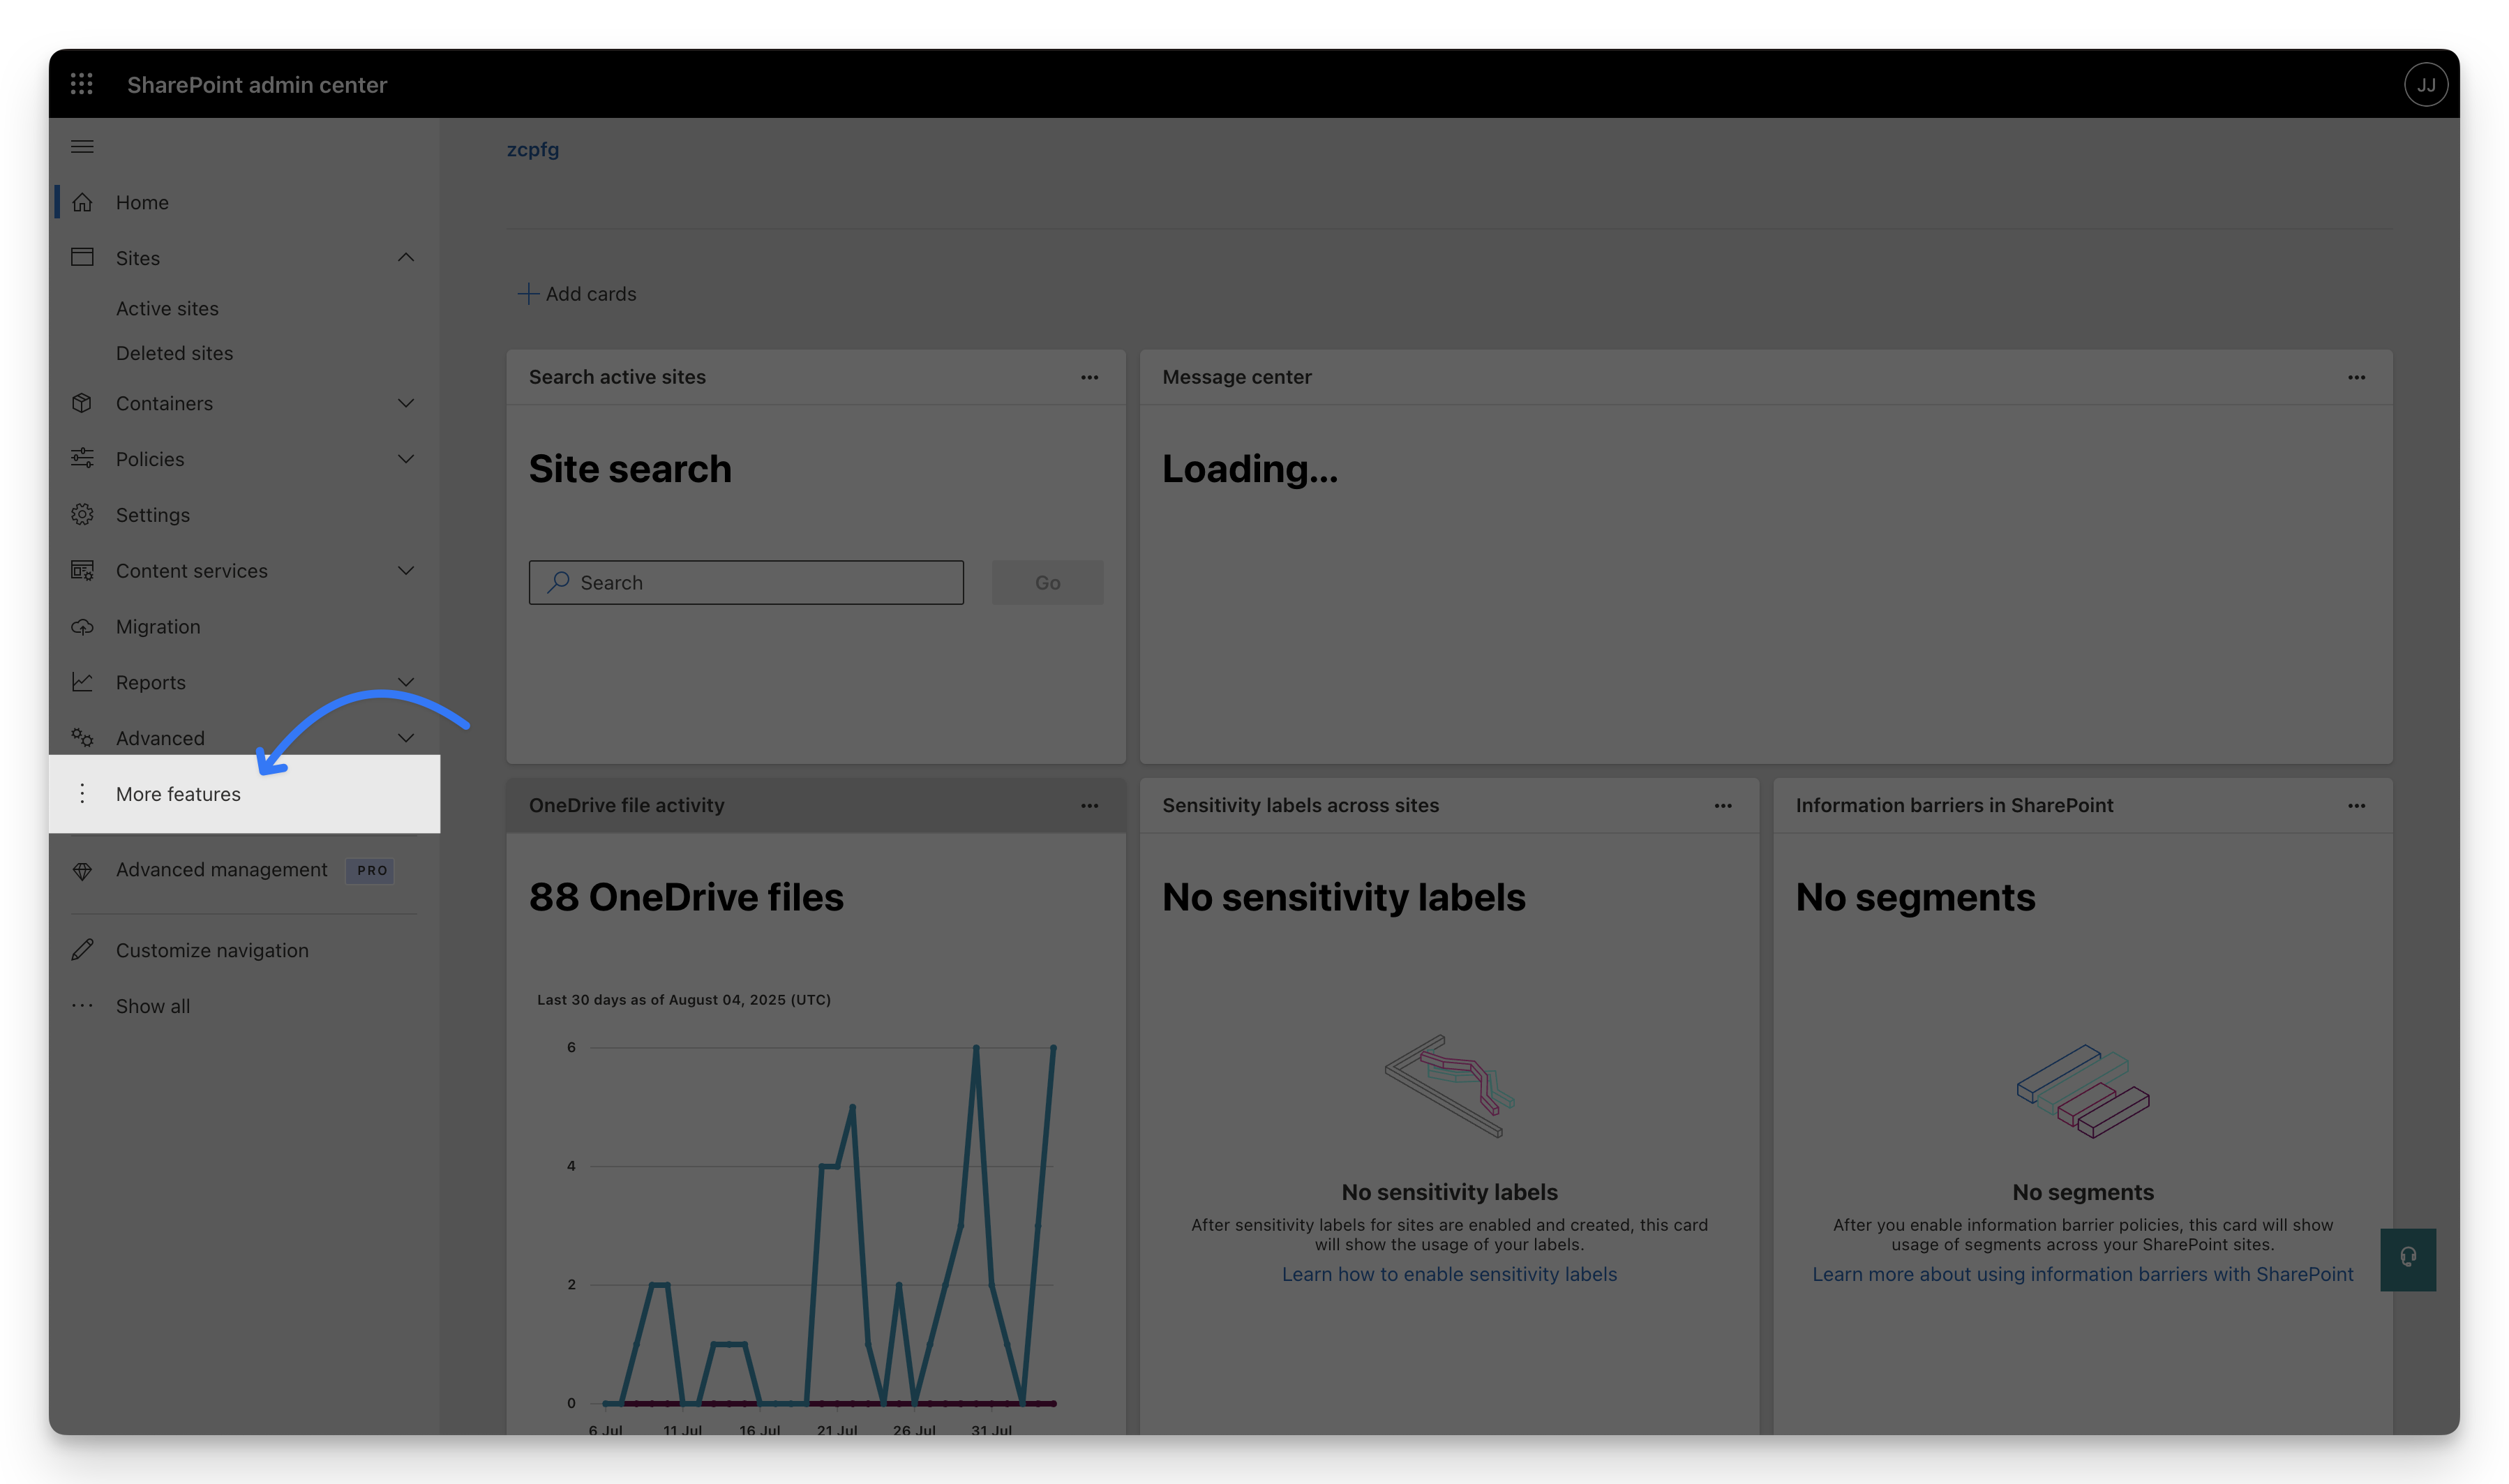
The More features page, that displays the features from the classic SharePoint admin center, is displayed.
-
On the More features page, under Apps section, click Open:
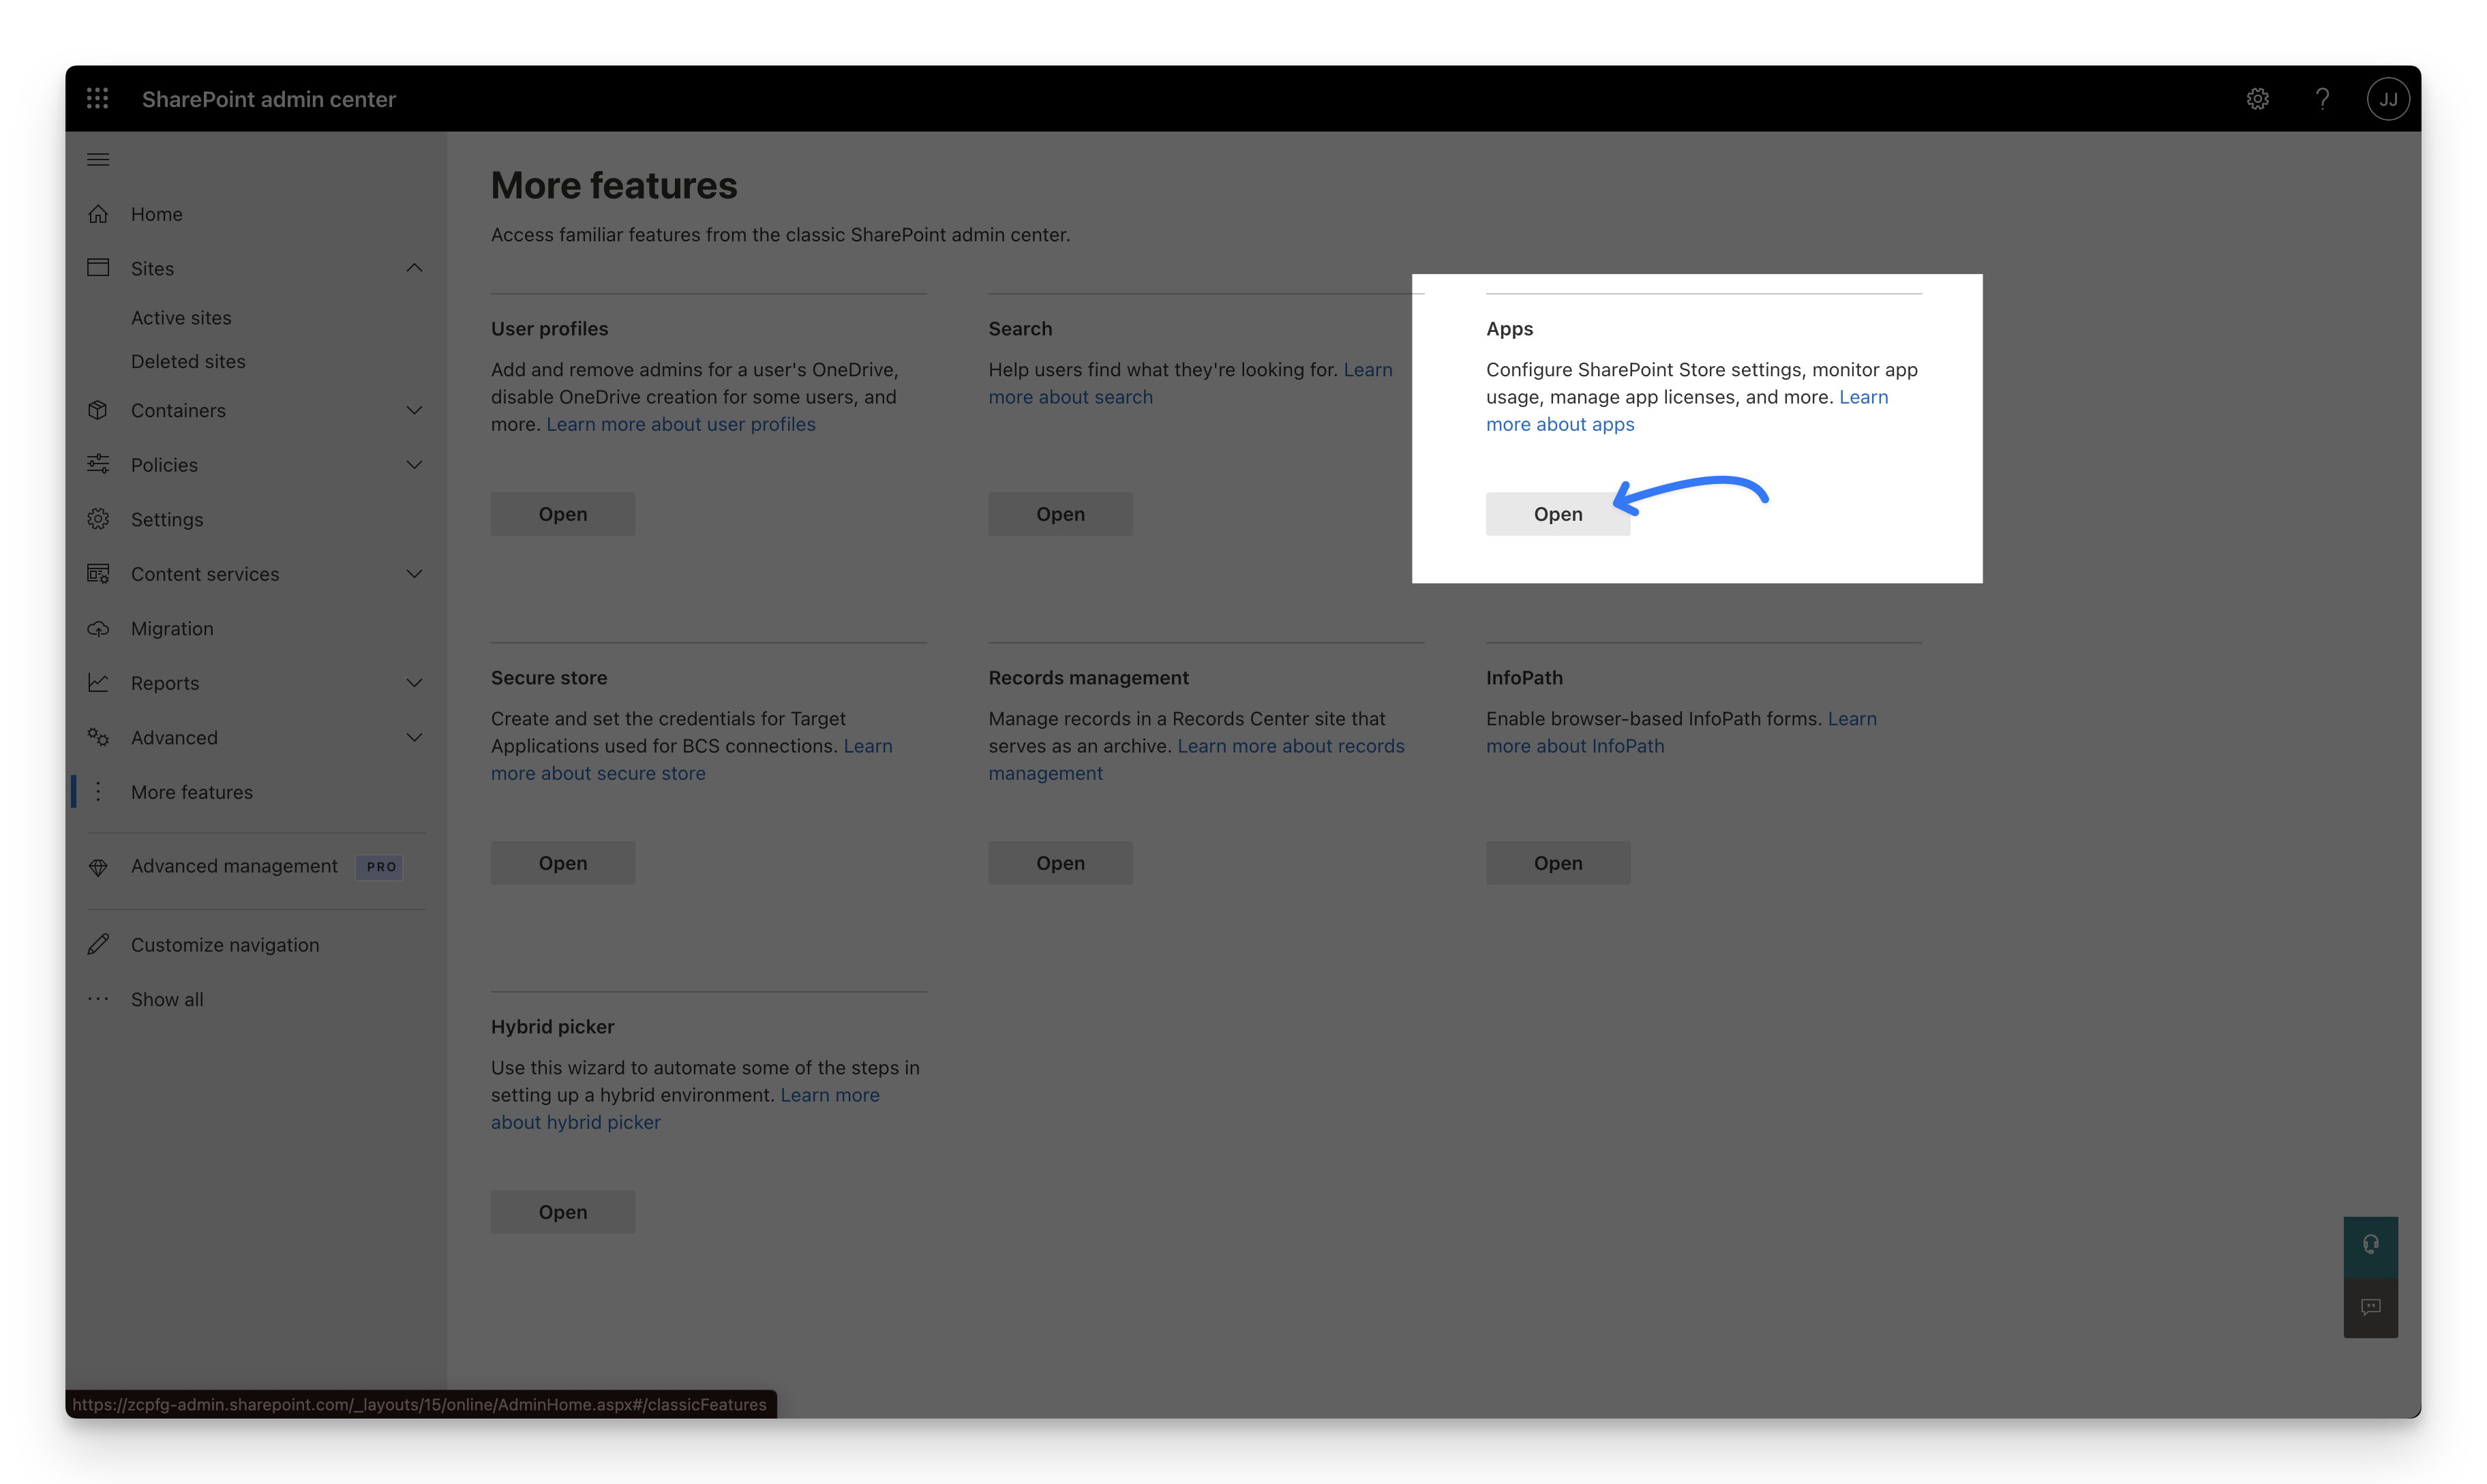
The Manage apps page is displayed. This page is your document library that displays the apps available in your tenants. From here, you can upload, enable, and manage your apps.
-
On the Manage apps page, click Upload and locate the downloaded file. Select the WA200006393.cab file and click Open.
-
On the Enable app pop-up, choose your deployment option:
- To deploy to all sites automatically: Check the box "Make this solution available to all sites in the organization" and click Enable App. Sprocket will be automatically added to all your sites.
- To control which sites get Sprocket: Leave the box unchecked and click Enable App. You'll then manually add Sprocket to specific sites (see Installing on Individual Sites for instructions).

-
On the pop-up, click Go to API access page option to approve the API access permission. The API access page is displayed in a new browser tab.
Approving the Uploaded Package in the Apps
-
Select a package and on the top, click Approve.
 On this page, the API name column displays Pending requests under the Organization-wide section.
 -
On the pop-up, click Approve.
-
Repeat the steps for all the pending requests.
Once completed, all the approved packages are displayed under Approved requests in the Organization-wide section.
Congratulations!, you have now installed Sprocket. Once installed you can see your Sprocket web parts when editing a SharePoint page. You will also see the Sprocket Settings icon in the bottom left corner of every page.
After the installation, it may take up to 10 minutes to see the Sprocket icon on your SharePoint site, due to SharePoint's caching techniques. If it’s still missing after that time, try clearing your browser cache or contact support.